Google Forms is a great free tool for designing surveys or quizzes. In this step by step tutorial I’ll show you 3 ways of adding an image into your question to “spice” up your form a bit. I’ve also added the video tutorial at the end of this post :)
When you start a new blank form there is a question already visible for you to edit straightaway. If you haven’t used Google Forms before and want to know how to access / use it then I would suggest you check out my video showing a beginners guide to using Google Forms first then come back to this tutorial.
There are 3 ways to use images within the form: you can add an image as a separate object, you can insert an image as part of the question, or you can add an image as an option in a few of the question types. I show you how to do all of these below…
Method 1: Add an image separately
This first way is if you want to add an image that’s separate from the questions, so it’s a separate object independent from everything else. Go to where you want the image added and click on the image icon listed on the floating menu on the right hand side…
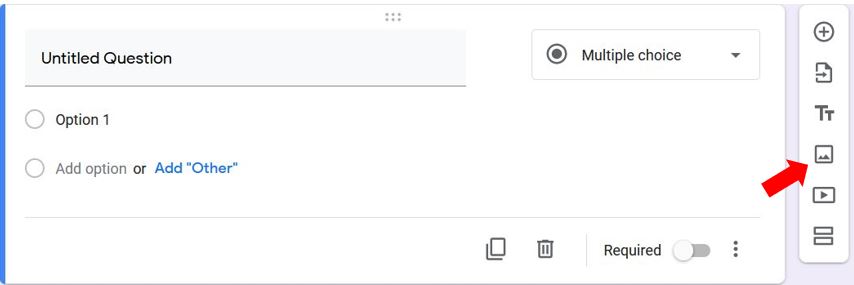
This brings up the insert image options where you can either upload an image from your computer, take a photo using an integrated camera (if available), type in a url of an image, access your photos folder across all your Google accounts, or search for a picture in Google Images…
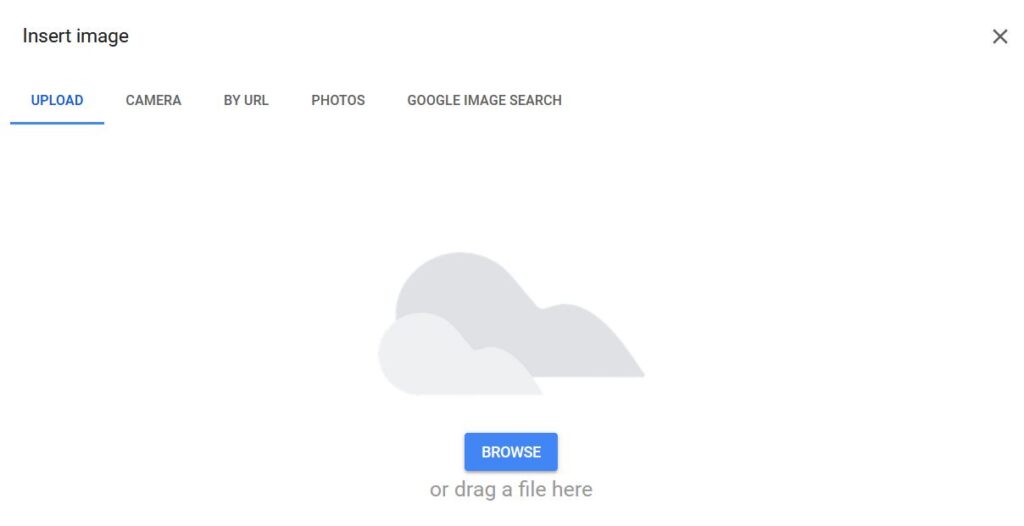
In this example I’ll just upload one from my PC…
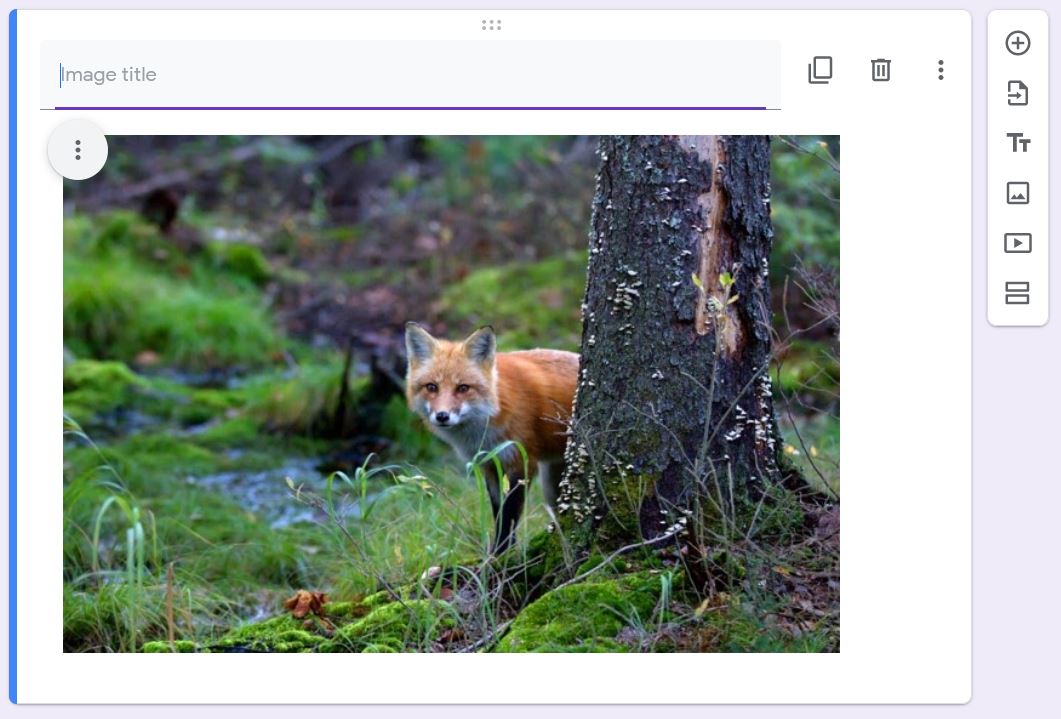
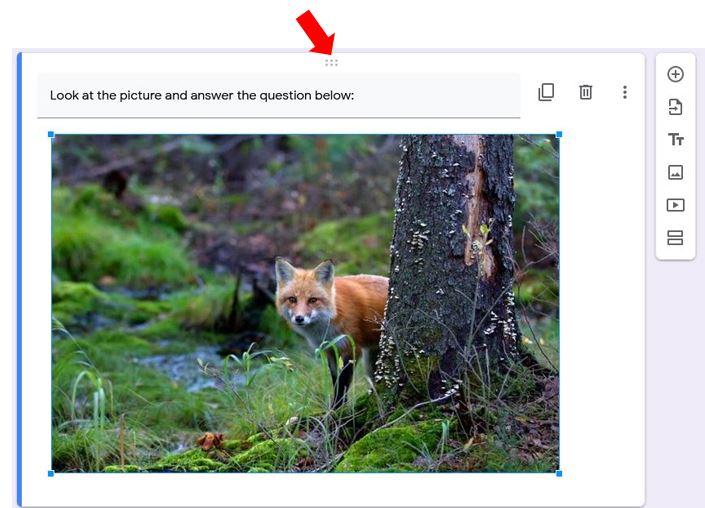
You’ll notice this is now a separate object and is not included in any question block. So you have to include an instruction of what you want the user to do. Where it says Image Title, you could type in the instruction “Look at the picture and answer the question below”, then you can add a question below relating to the picture…
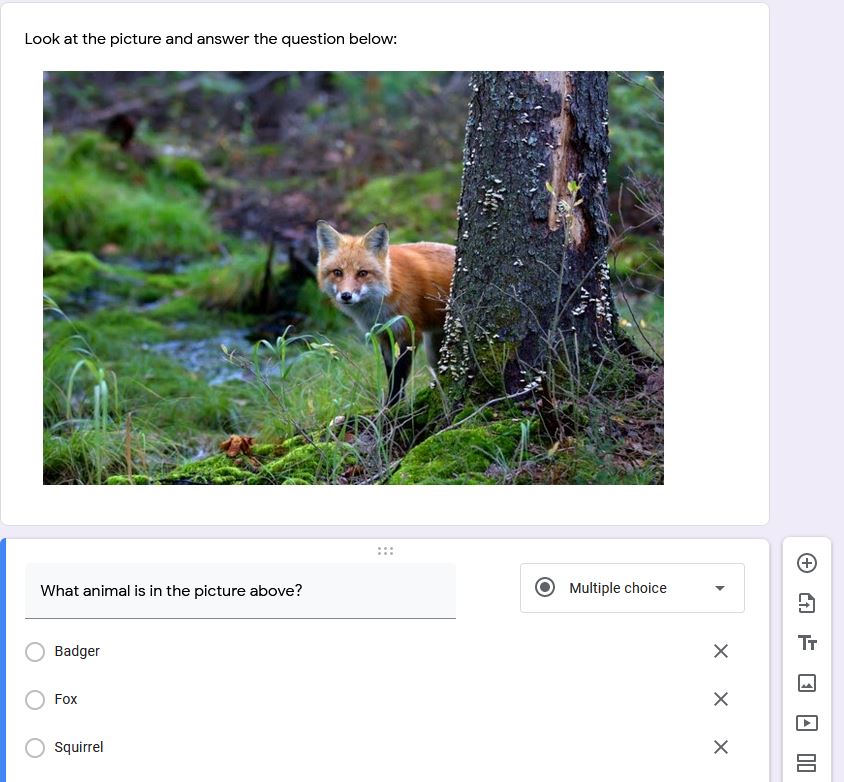
As the picture is a separate object it means you can move it to another place on the form by clicking the 6 dots at the top of the image and dragging it up or down the page…
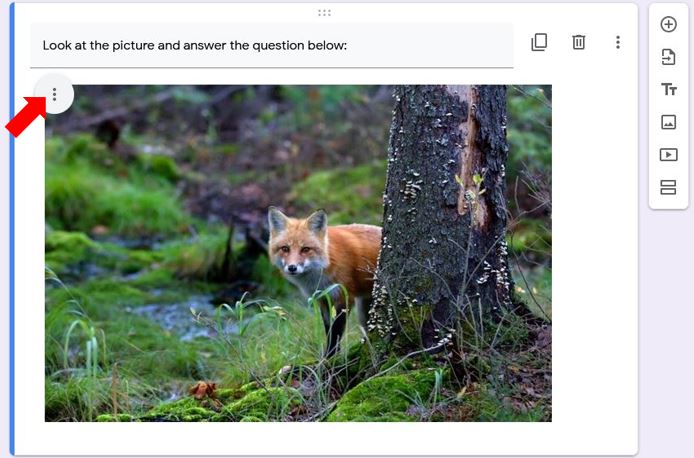
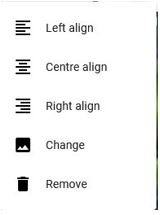
If you want to change the alignment or the image itself, click on the 3 dots on the left of the image and more options will appear…
Method 2: Insert image as part of the question
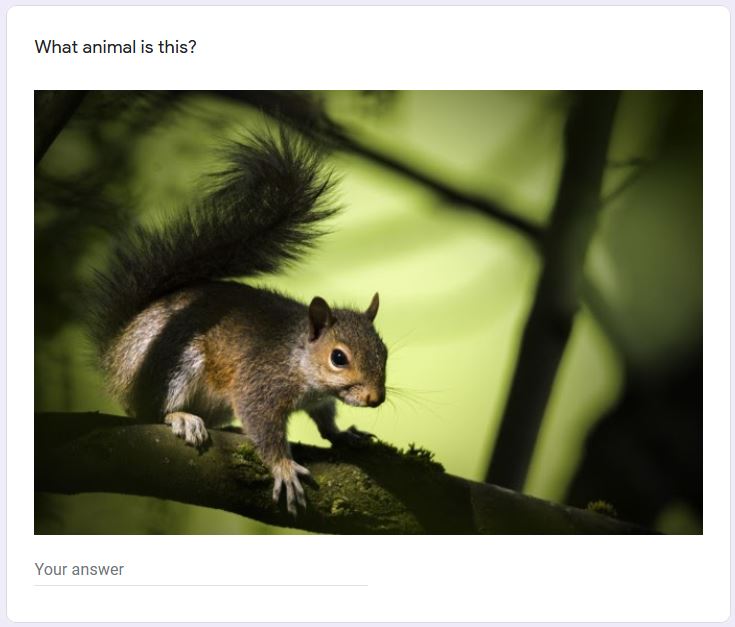
If you want to add an image as part of the actual question, type out the question, select the question type and you’ll notice an image icon to the right of the question…
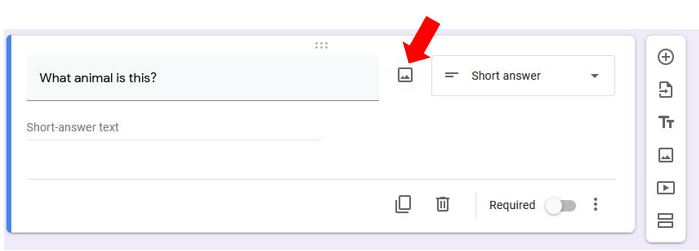
Click on the image icon and the same image upload options will appear as in Method 1 above, choose your image and you’ll see it now appears within the question itself…
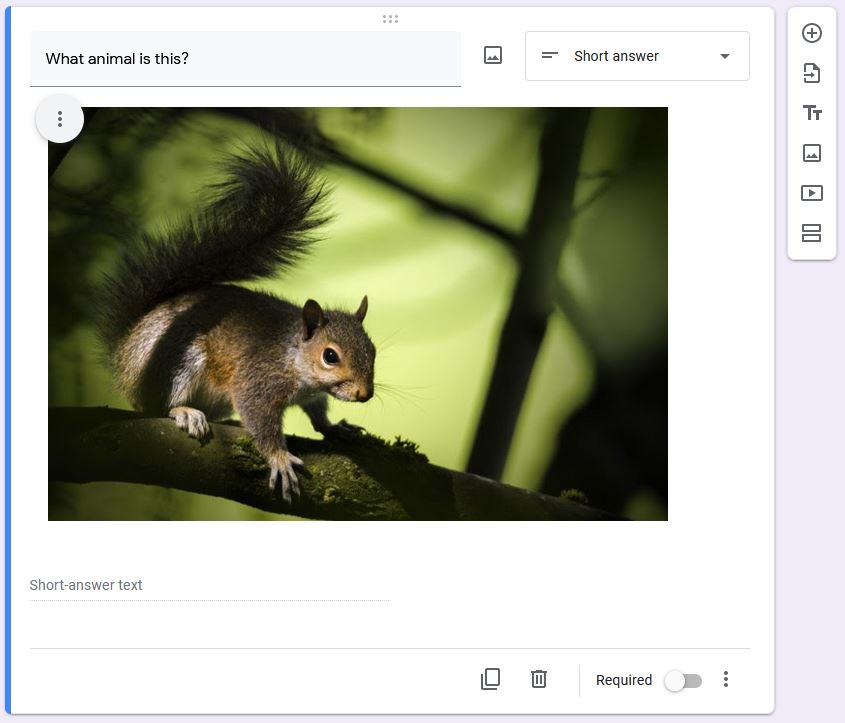
You still have the same alignment options for the image as in the previous method, however when you click on the 6 dots at the top of the section to move it, the whole object i.e. question and image will move as one.
Method 3: Add an image as an option in the question
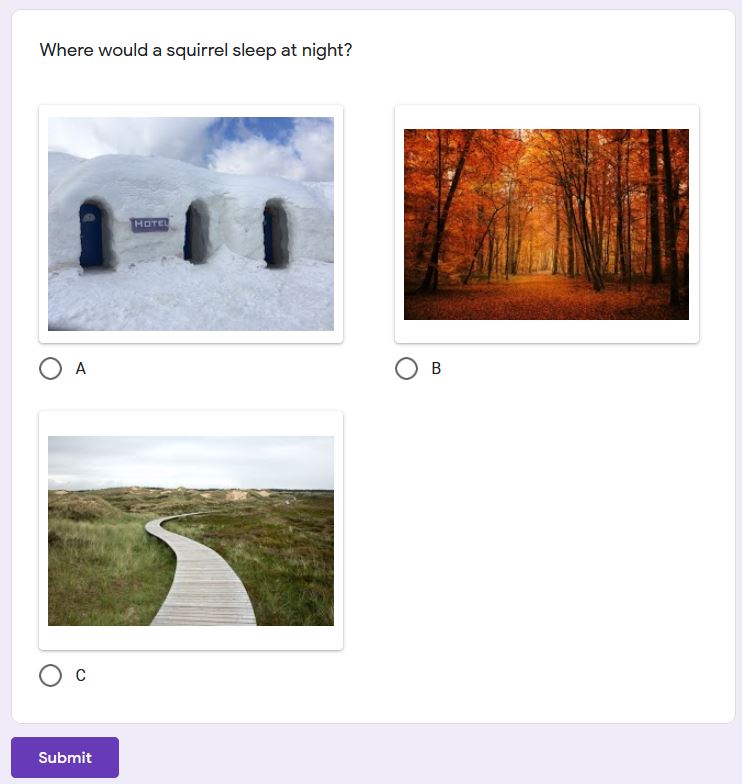
This method only works for 2 of the question types – Multiple choice and Checkboxes. After you type in the question, hover over the first option and click on the image icon over on the right hand side then choose an image to upload…
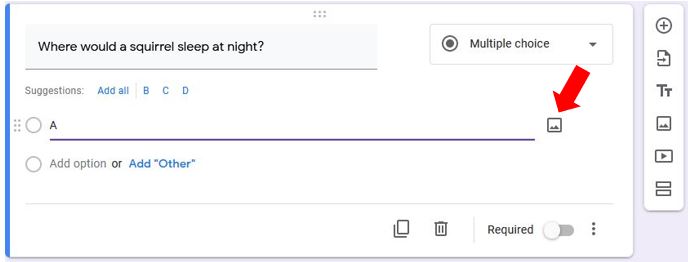
Just repeat that process for the other answer options…
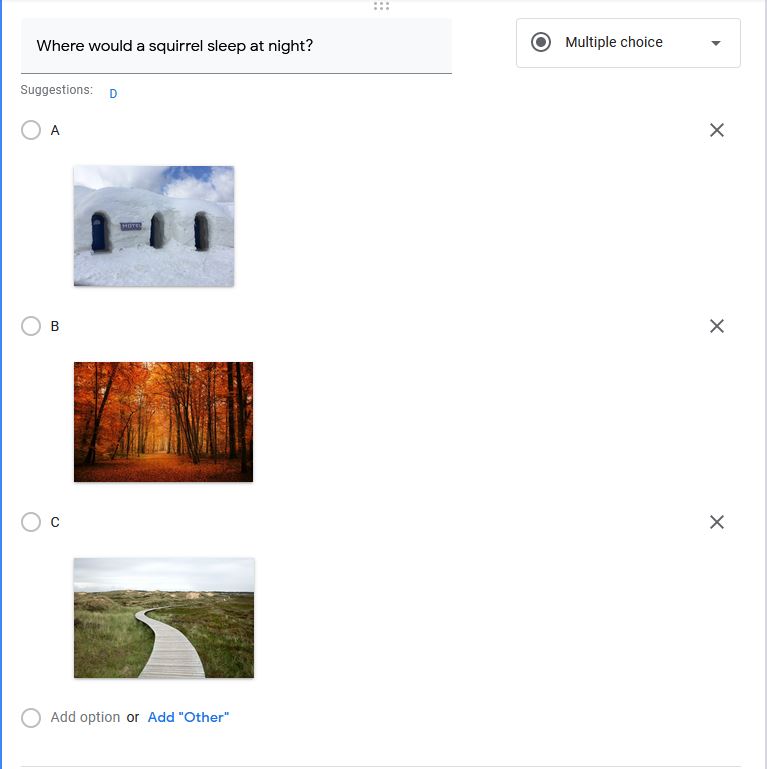
Once you have finished the form, click Preview at the top of the page…

… and you will view the form exactly how your users will see it…
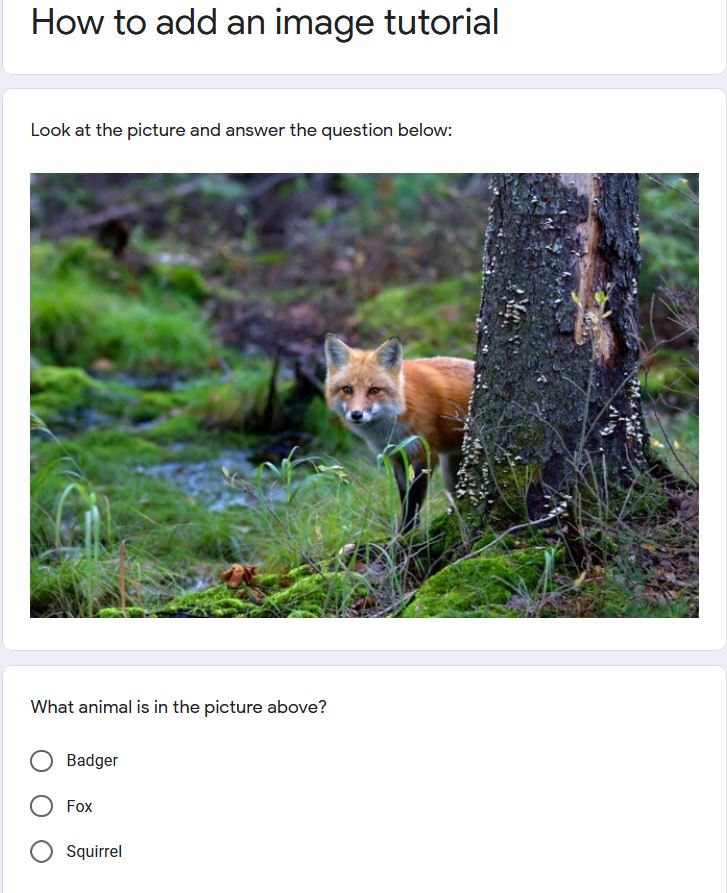
And that’s it – 3 ways to add images to your Google Form. I hope you found it helpful and let me know in the comments below if you have any questions :)
