If you’re working on a document, a project or proposal for example, and you need to have a few blank pages where information can be added at a later stage, this tutorial shows you 3 quick ways of inserting those pages. Scroll down to the end of this post if you prefer to watch the video :)
1. Using the ribbon
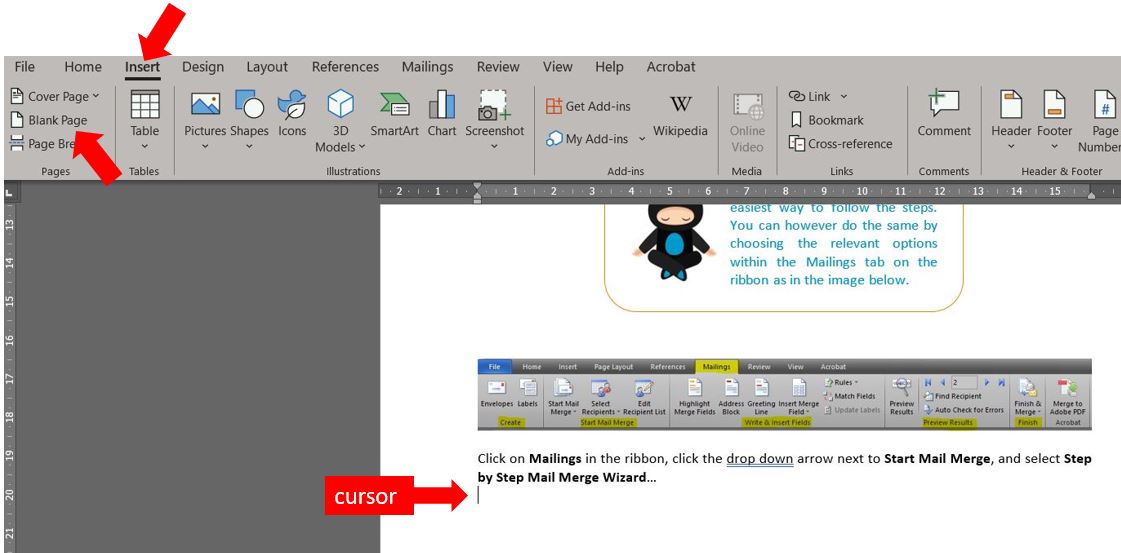
First, place your cursor on the page before where you want the blank page to be.
Go to Insert on the ribbon, and click Blank Page in the Pages section. This will insert a blank page after the page your cursor is on. In the example below, my cursor is on page 10…

You can see in the Navigation pane below that the blank page has now been added after page 10…

NOTE: Any content you have on the same page after the cursor, will be moved to the page following the new blank page.
2. Using line breaks
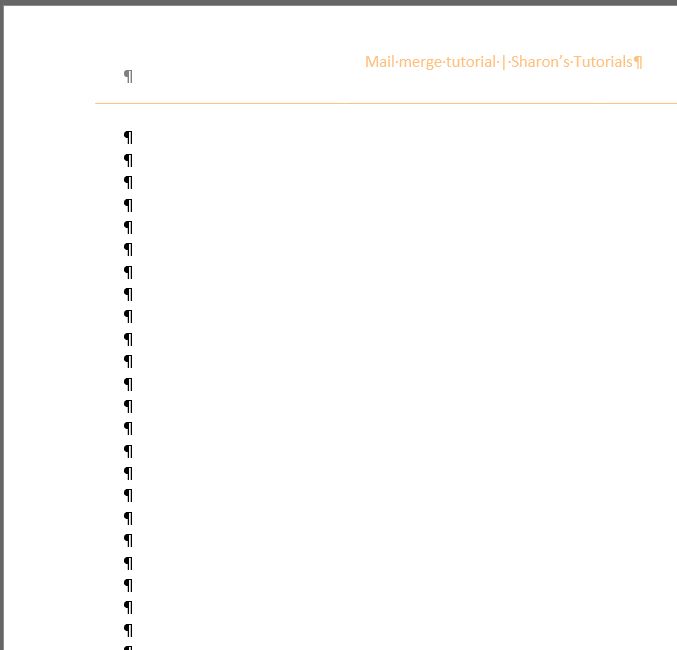
Another (really tedious) way of adding a blank page is to keep pressing Enter to move down the page. You can see in the image below, the line breaks made by pressing Enter…

3. Using a keyboard shortcut
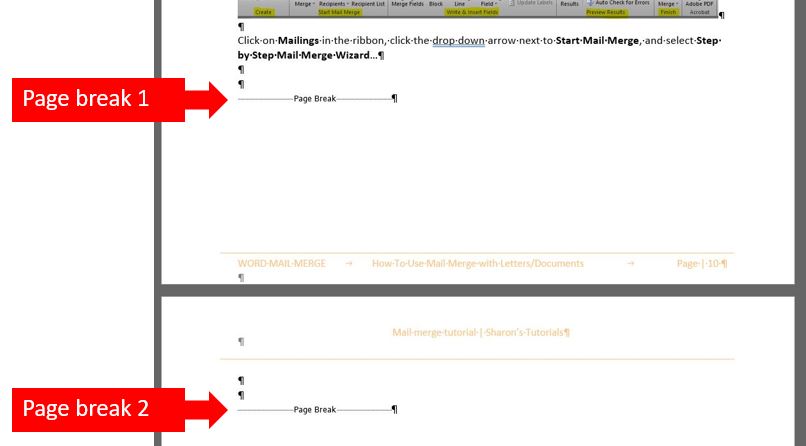
A really quick way of adding a blank page is to use a keyboard shortcut to insert a page break. Place your cursor at the end of the page preceding where you want the blank page to be and press Ctrl+Enter to insert the page break. If the blank page doesn’t appear, press enter a couple of times on the next page and type Ctrl+Enter again and the blank page will appear. To see where your page breaks are located, click on the Show/Hide paragraph marks on the Home tab on the ribbon…


How to view page thumbnails
A handy way of seeing if you have blank pages, and the layout of your document is to view the thumbnails. To do this, go to the View tab on the ribbon and in the Show section, tick the Navigation Pane box…

The navigation pane will open up on the left hand side of the page. Click on Pages and you will see the thumbnails of the pages…

I hope you have found this useful, let me know in the comments if you have any questions or other tips regarding blank pages in Word :)
