If you use Microsoft Office then you may be aware of the handy Remove Background tool. If you haven’t used this before, then read on as I show you how to do it step-by-step.
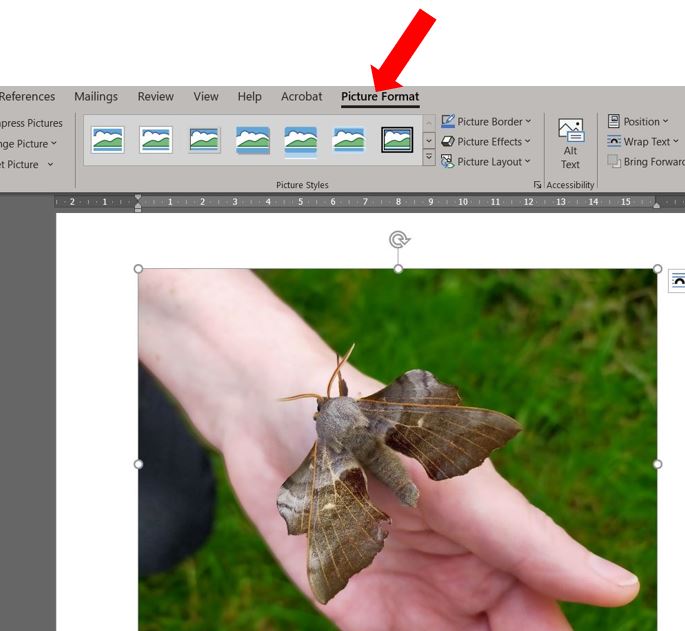
I’ll be using MS Word in this tutorial, but it’s the same process in both PowerPoint and Excel too. Firstly insert an image that you want to use then once it’s inserted, click anywhere on the image to bring up the Picture Format option in the ribbon…

Over on the left hand side, you’ll see a button called Remove Background…

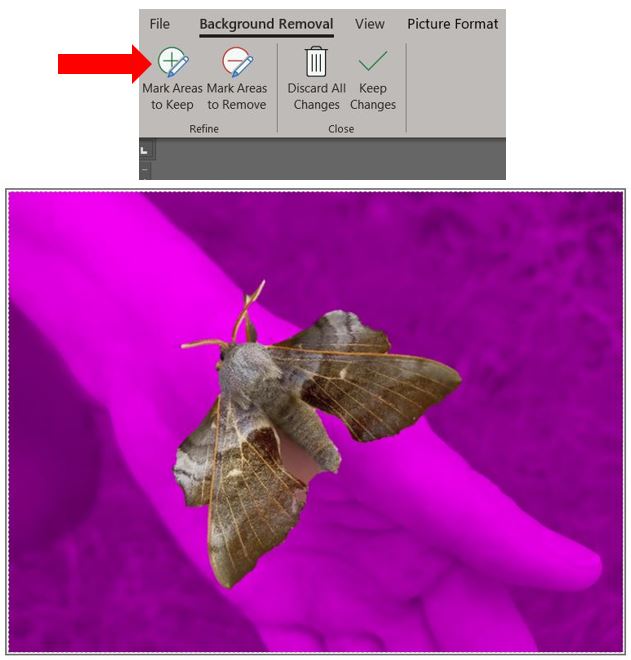
Click on it and it will automatically select a section of the background and colour it violet. Depending on the detail in the image, you may have to tell it to remove more of the background, or keep certain areas. To do this, click on either Mark Areas to Keep or Mark Areas to Remove, then click on the relevant area in the picture (you’ll notice the cursor has now changed to a pen)…

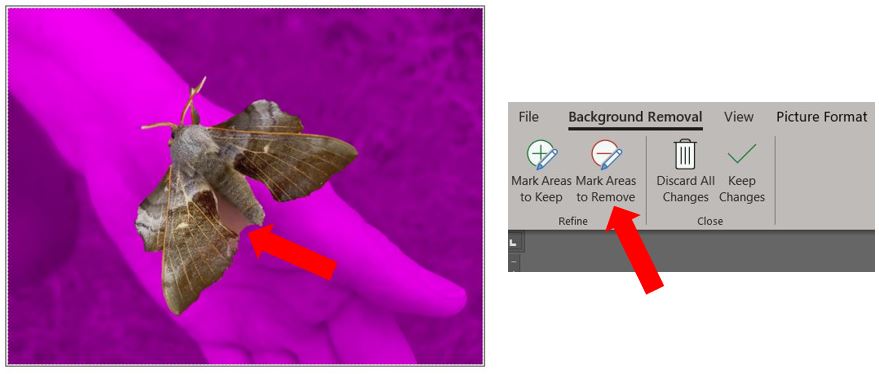
In the example image above, there is a small section of background that it hasn’t cleared between the bottom of the moth’s left wing and its body. So I’ll click on Mark Areas to Remove and click on that area. If the background doesn’t remove on the first click, keep clicking on different areas around that section until it’s gone. If it’s a big section of background, click and drag the pen in it and it will select a larger area…

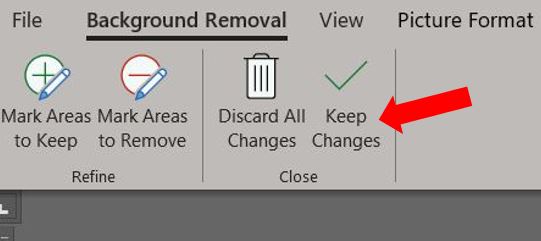
Once you’re happy with the result, click on Keep Changes…

And the background will be gone :)

If you need to re-add the background, just go back into the file, select the picture and click on Picture Format, then Remove Background. It will show the original picture so you can click on Mark Areas to Keep and start selecting the background you want to keep…

So there you have a quick way of removing the background of a picture using MS Office – I hope you found it useful :)
