There is a common divide between those who insist on including bullet points on EVERY slide of their presentation, and those who just don’t use them at all… I think there can be happy medium. You don’t necessarily need to use the conventional bullet point to get your message across – you could try converting it to a SmartArt graphic instead. This tutorial shows you how :)
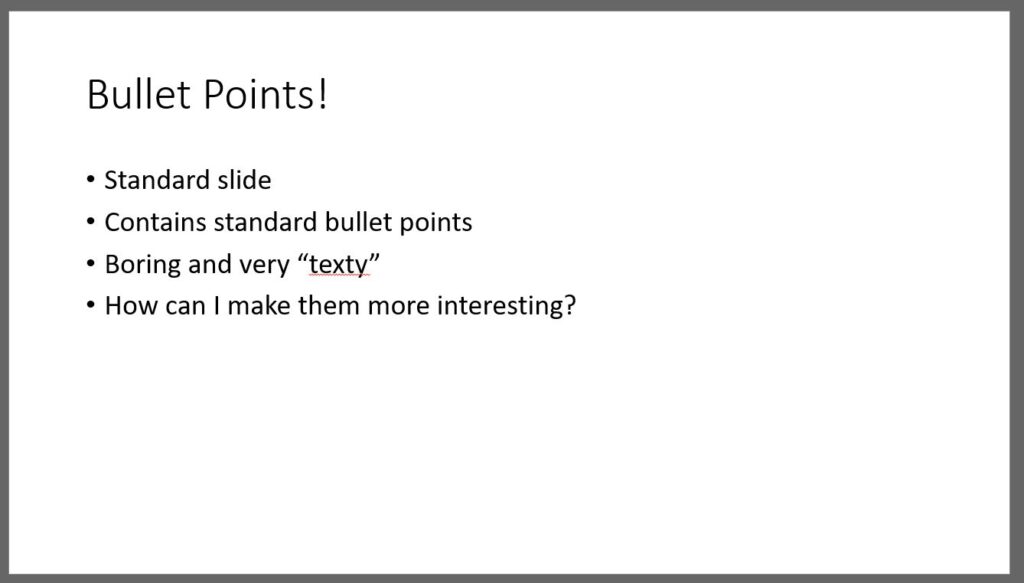
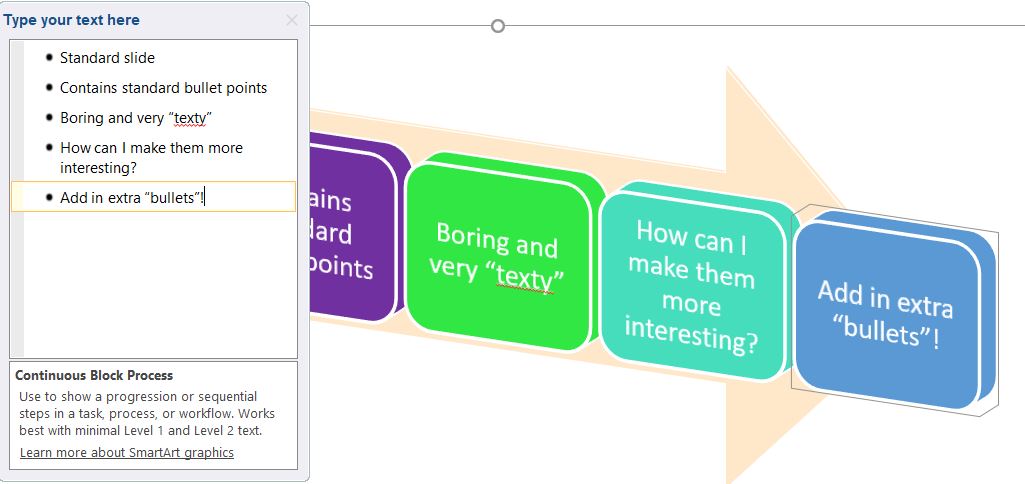
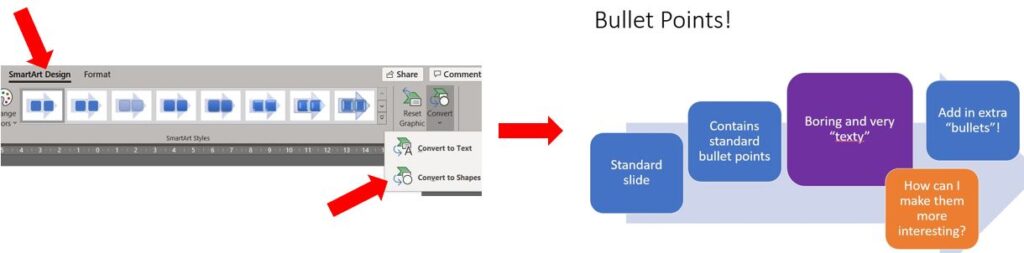
Below is a standard slide created in PowerPoint which contains standard bullet points…
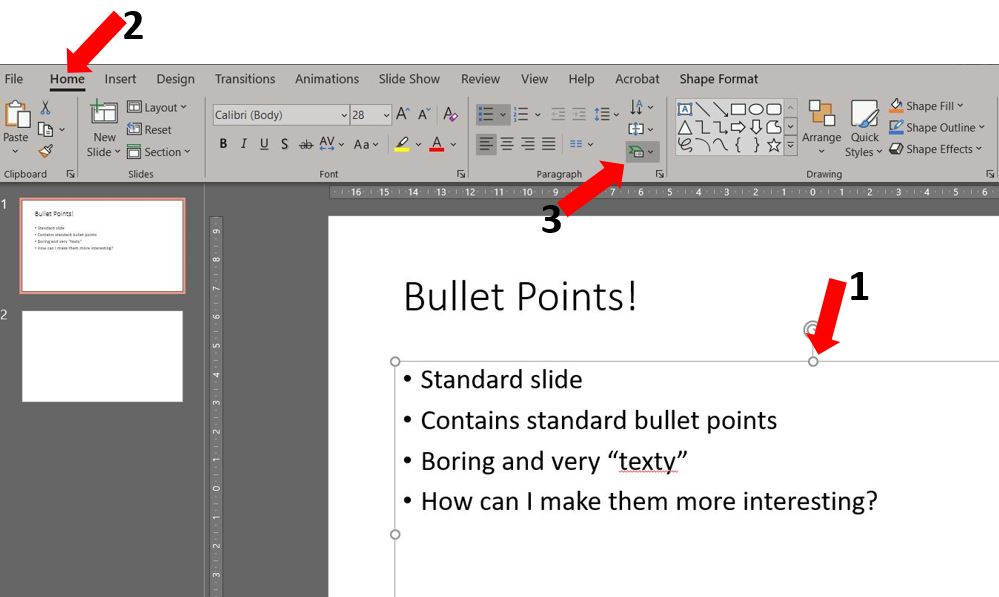
In order to “jazz” it up a bit, first select the box containing the bulleted text, click on the Home tab on the ribbon, go to the Paragraph group and click Convert to SmartArt Graphic…
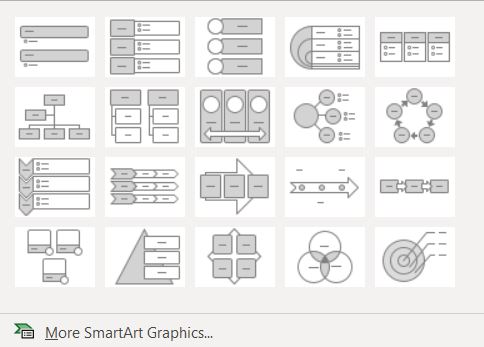
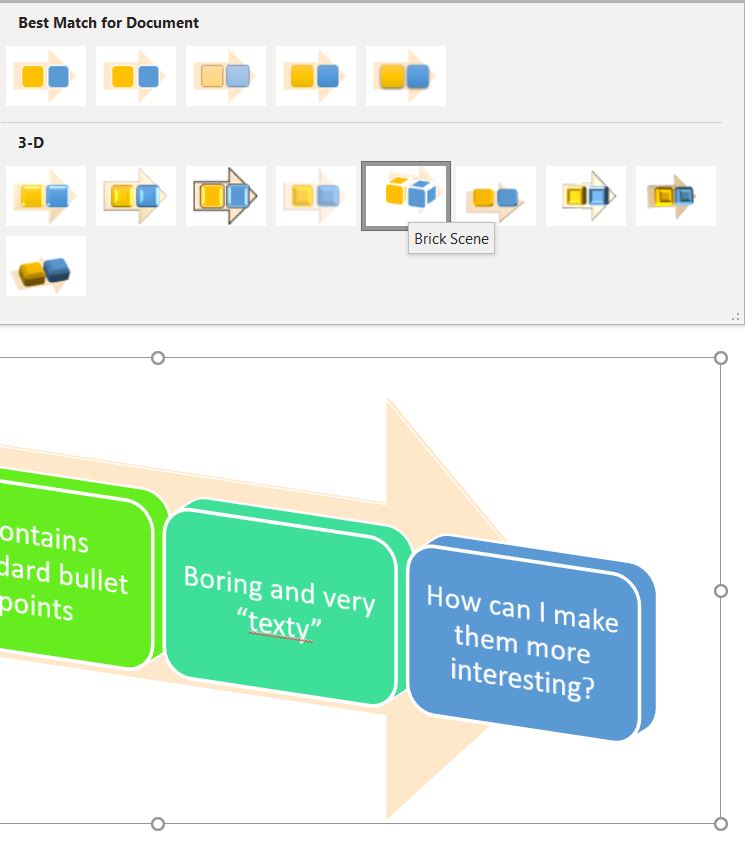
This will bring up the SmartArt graphics menu for you to choose the style you like…
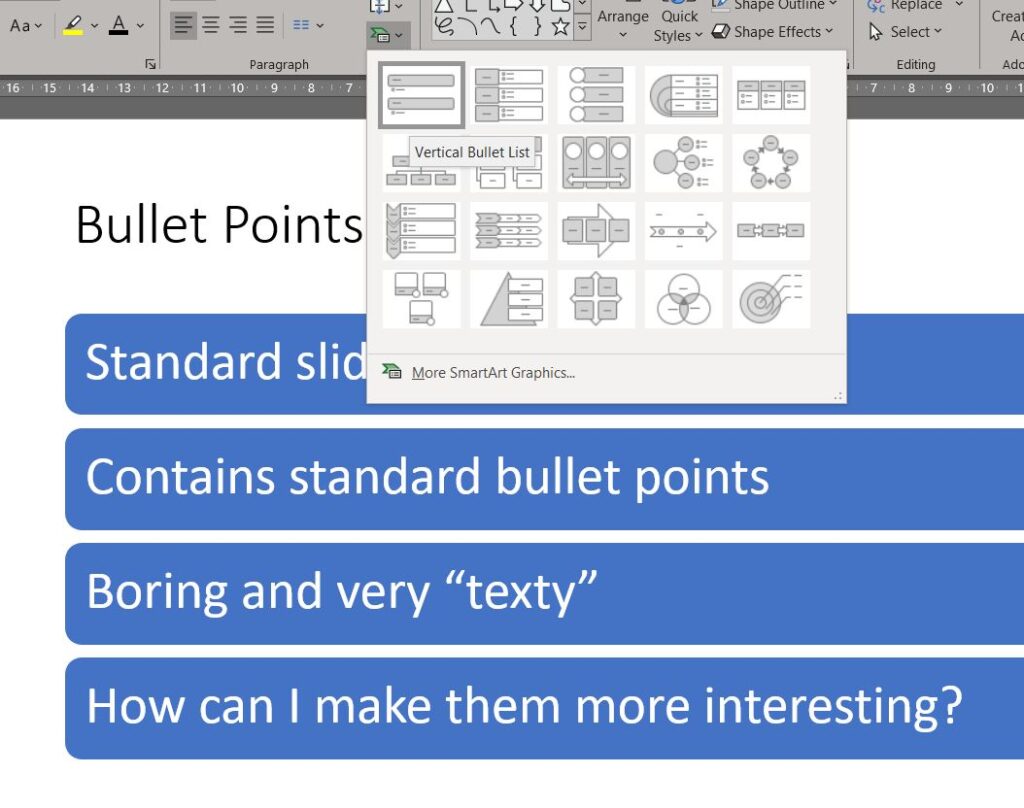
As you hover over each style you’ll see your bulleted slide will show a preview of that particular style…
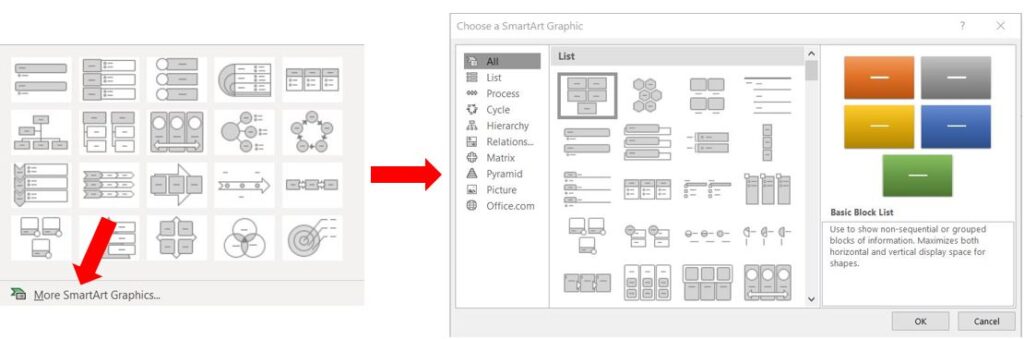
If you don’t like any of those options, click More SmartArt Graphics and it brings up the full SmartArt menu with details of each graphic…
Once you have decided on a graphic, and it is selected on the slide you’ll notice a SmartArt Design tab has appeared on the ribbon. This is where you can format the colours, add in more shapes to the graphic, format the text, reset the graphic, or convert it back to either text or shapes…

To change SmartArt colours
To change the colour of your graphic, click the drop down arrow next to Change Colors, scroll down to view the colour options, and choose the one you prefer…

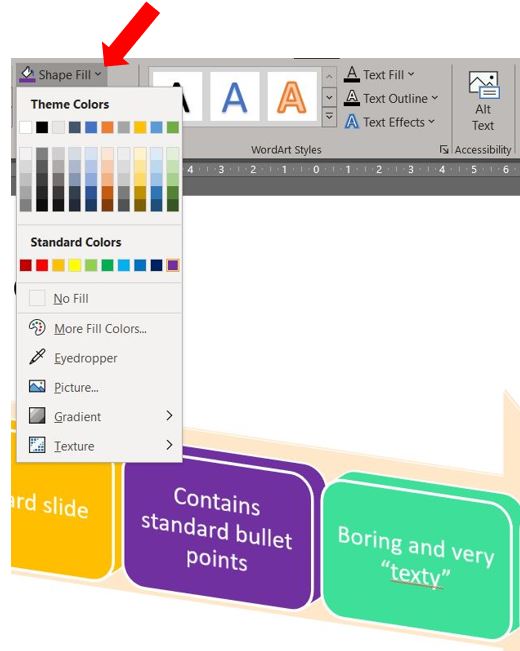
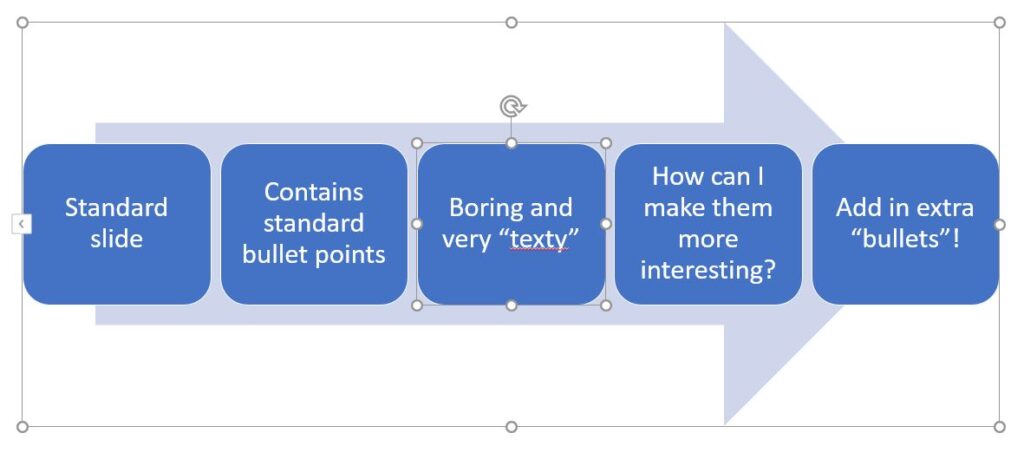
If you don’t like any of the colour options on the list, you can format each shape separately. Click on one of the shapes in the graphic on your slide, then click into the Format tab on the ribbon…

Go to Shape Fill and click on the drop down arrow to the right, then choose your colour…
To change SmartArt effects
To change the effect of the graphic, click on the drop down arrow on the right hand side of the SmartArt Styles group on the ribbon, and choose the effect you prefer. Again if you hover over the different options, your graphic will change to show you what it looks like – like a live preview…

To change the text in the graphic
If you want to edit the text you can either click straight into the text and start typing, or click the arrow to the left of the graphic and type into the text box where the bullet points are listed…
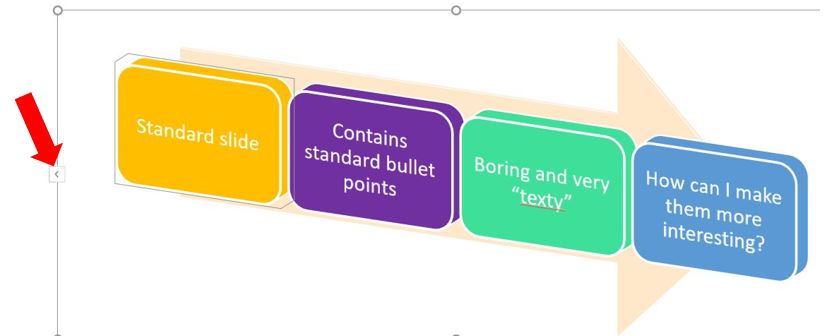
You can also add or remove bullet points here too, and the graphic will add or remove shapes accordingly…
To reset the SmartArt graphic
If you want to remove all of the changes made to the SmartArt graphic, select the graphic on the slide, click into the SmartArt Design tab on the ribbon and click Reset Graphic over on the right hand side…
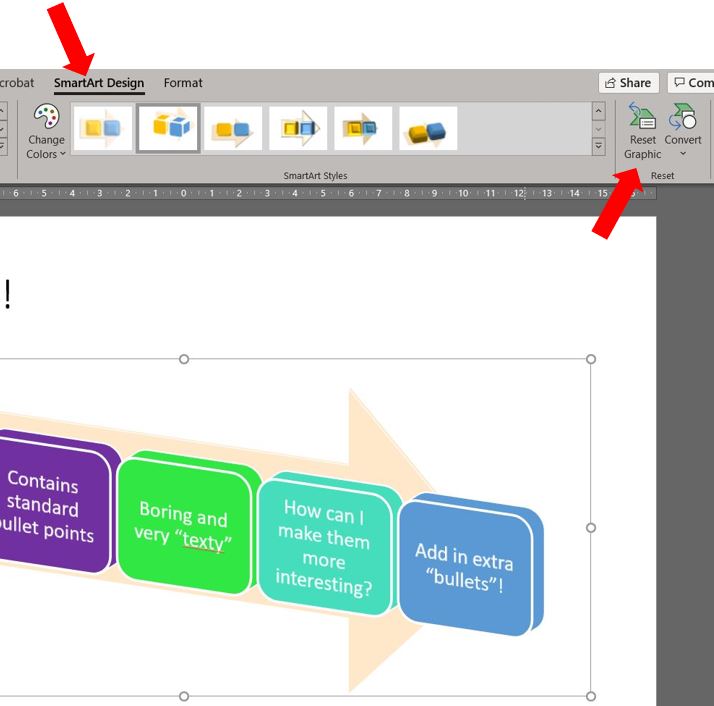
This takes you back to the original design – any changes you have made to the text will still be there…
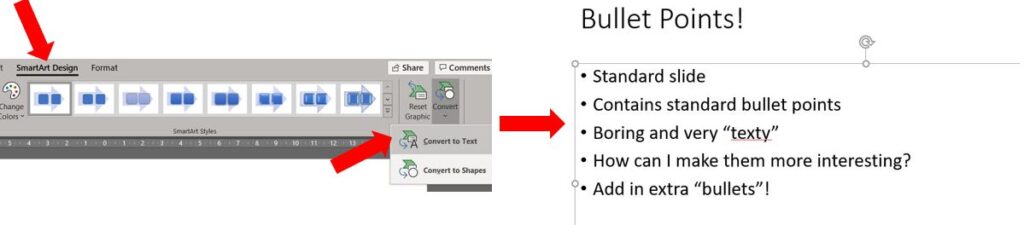
To remove the SmartArt graphic
If you want to remove the SmartArt graphic completely, you can either click on Convert to Text where it will go back to being bullet points in a text box…
…or you can click on Convert to Shapes, where it will change to individual shapes which you can format independently from the others…
Hopefully this tutorial shows you how easy it is to use something else other than the usual bullet points and make your PowerPoint slides a bit more different :)