One way to help manage email overwhelm is to keep your inbox organised, so in this step-by-step tutorial I’ll show you 3 ways to create a folder (aka label) in Gmail. I hope you find it helpful. The video tutorial is at the end of the post if you prefer to watch instead :)
1. From an email
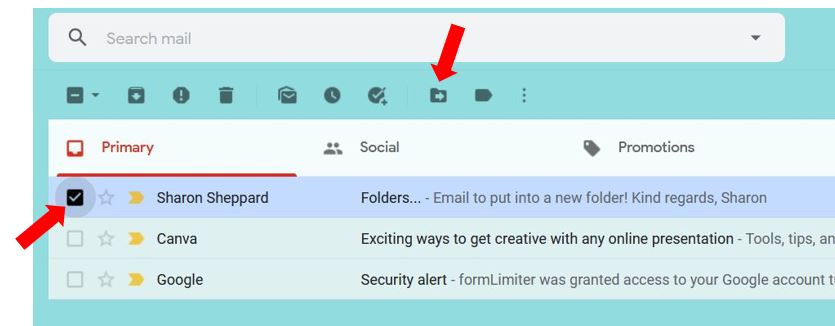
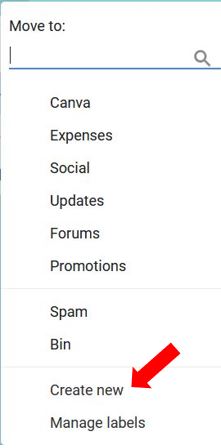
If you have an email already in your inbox that you want to move to a new folder, first select the email by ticking the box on the left of it, then click on the Move to icon and select Create new…
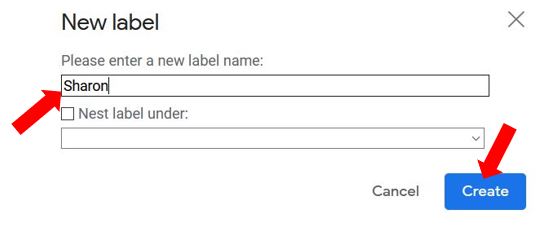
Type in the name of the new label and click Create…
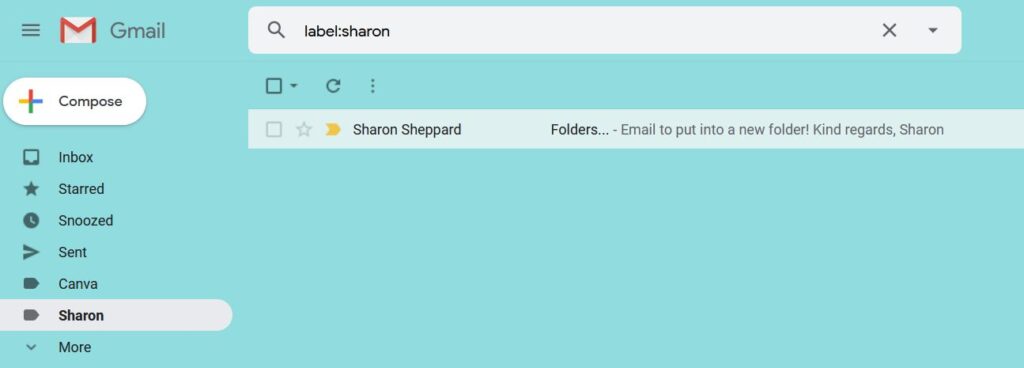
The new label is now listed on the left hand side in the menu, click into the label and the email you previously selected will be in there and no longer in your inbox…
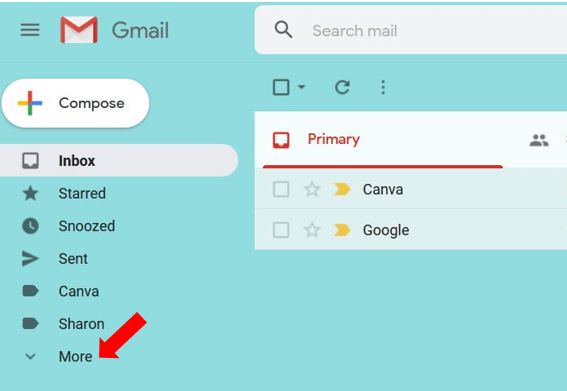
2. From the menu
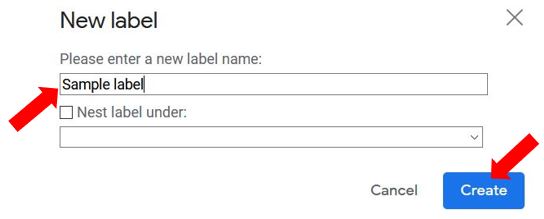
If you don’t have an email in your inbox and you just want to create a label for future use, click on the More at the bottom of the left side menu, scroll down to the end then click Create new label…

Type in the name of the new label and click Create…
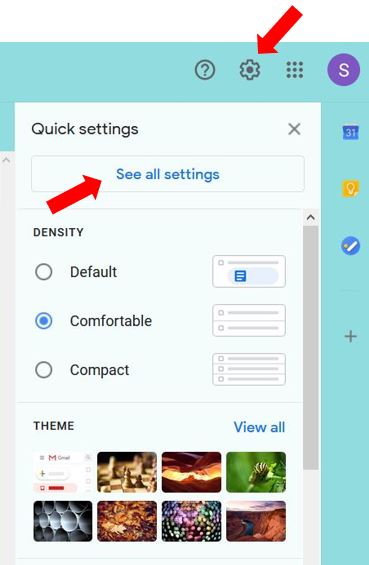
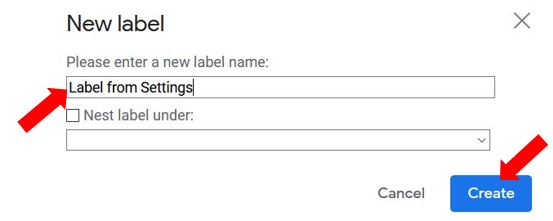
3. From settings
The 3rd way to create a new label is from the Settings menu. Click on the cog in the top right corner then click See all settings…
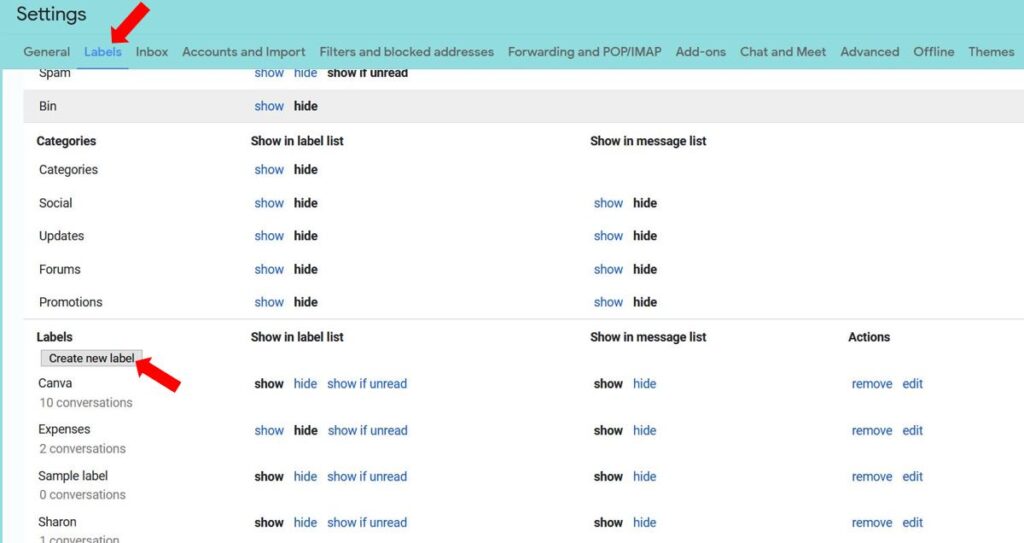
Click into the Labels tab and you’ll see a list of all the labels you currently have. This is where you can set the visibility of the labels, edit them, create new ones and remove them. Scroll down and click on the button called Create new label…
Type in the name of the new label and click Create…
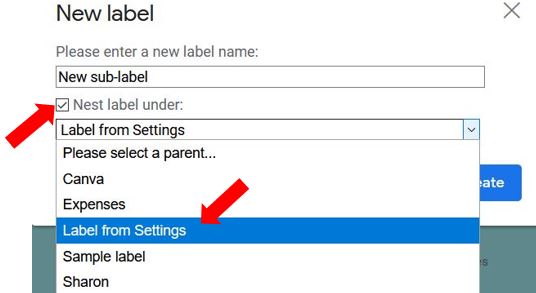
How to create a sub-label
If you want to create a sub-label, follow one of the methods above and when you get to the part where you name the label, tick the box called Nest label under:, select which label you want the new one to appear under and click Create…
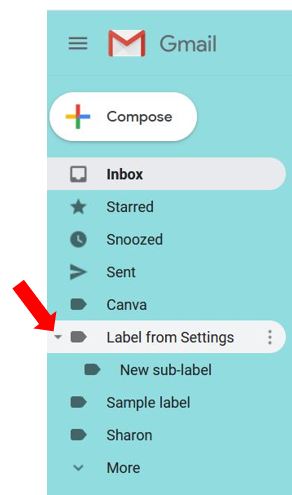
You’ll now notice a little drop down arrow next to the parent label on the menu on the left hand side, click on the arrow and the sub-label will be listed underneath…
How to colour the label
If you want to apply a colour to the label so it makes it easier to see in the menu, hover over the label name and click on the 3 dots that appear to the right of it – this opens a mini settings menu where you can edit the label, remove it, show/hide it in the menu, add a sub-label and apply a colour…
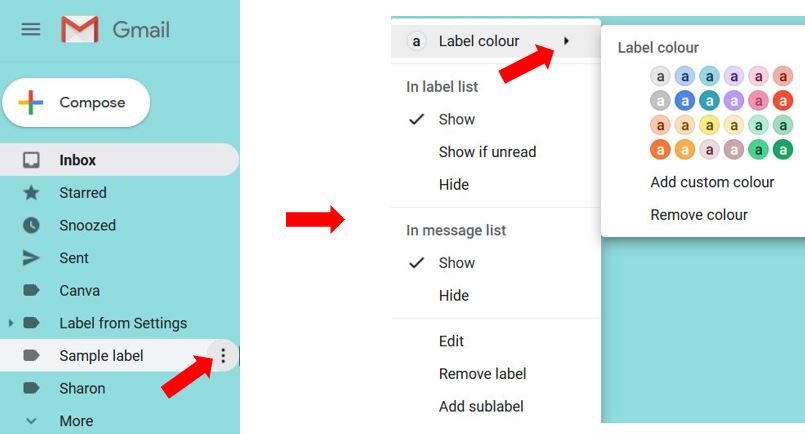
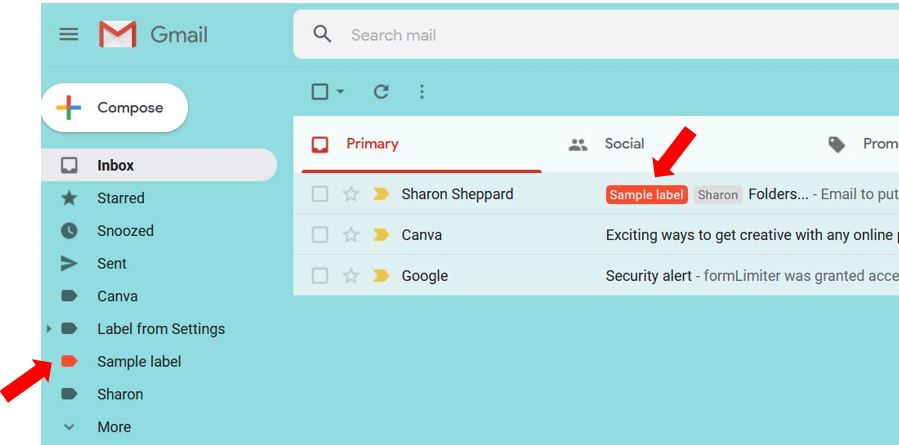
Click the colour you prefer, and that colour will be visible to the left of the label name. If you apply multiple labels to one email, the email will list the label name and will be coloured accordingly. The first email below is located in the inbox but also has 2 different labels applied, one of which is coloured red…
How to quickly remove a label from an email
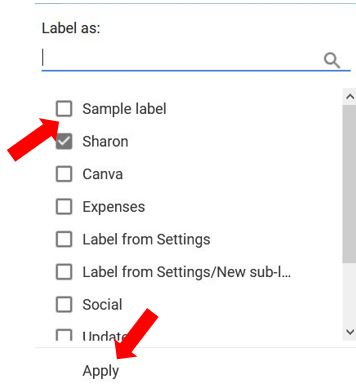
If you no longer want a label to apply to an email, tick the box to the left of the email, and go to the Labels icon at the top…
You’ll see the applied labels are listed at the top, simply untick the one you no longer want and click Apply, and the label will be removed from that email…
So there you have 3 ways to create a new label or folder in Gmail. I hope you found it helpful :)