In this post I’m going to show you step-by-step how to set your default text font, size & colour, as well as how to change it when typing out an email or replying to one. You’ll also learn about the different formatting options available to you, as well as how to quickly remove any formatting you’ve done.
If you prefer to watch the video tutorial, scroll down to the end of this post :)
Set your default text font, colour & size
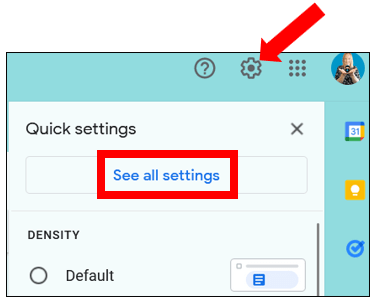
Firstly, click on the cog wheel in the top right corner of the screen and go into See all settings…
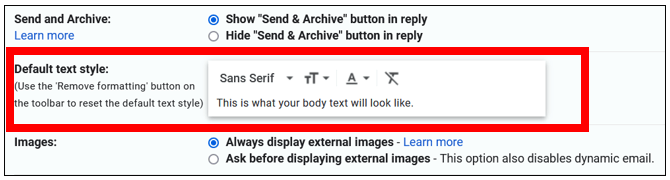
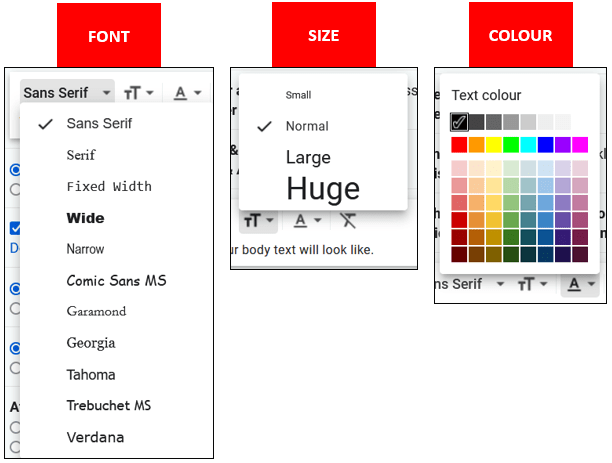
In the General tab, scroll down to Default text style. Click on the drop down arrows next to the font, size and colour to choose your preferences – a word of warning if you’re using the email for professional or business purposes then please refrain from using Comic sans font! A small preview of what your text will look like is underneath the options….
If you want to reset the font back to its default, click on remove formatting…

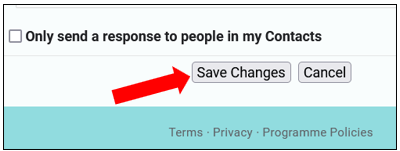
Once you’re happy with the font style, remember to scroll down to the bottom of the page & click Save Changes…
Formatting text when composing an email
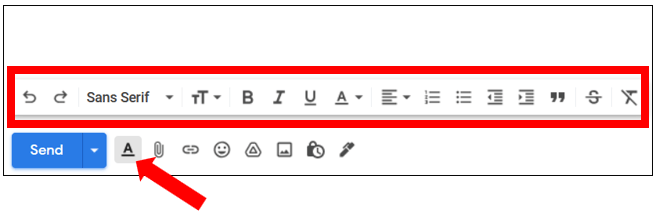
When you’re typing out an email, click on the Formatting Options button at the bottom (the underlined A button) – this is where you can overwrite the text font & size that you’ve set as your default in any email. You also have additional formatting options of bold, italics, underline and not only text colour but also background colour.
You can change the alignment of the text, add in bullet points & numbered lists – increase & decrease indents, add a quote line and also strikethrough words…
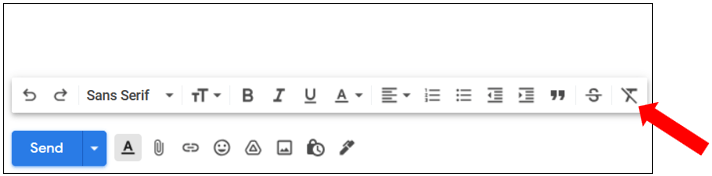
There is also the option of getting rid of all of the formatting which you do by highlighting the text & clicking remove formatting…
If you don’t use the full screen mode when you type out your email (e.g. the email is in the bottom right corner of the screen), then your formatting options may look slightly different – to view them all you’ll need to click on the formatting options button (underline A button) first, then click on the arrow over on the right side to expand the options…
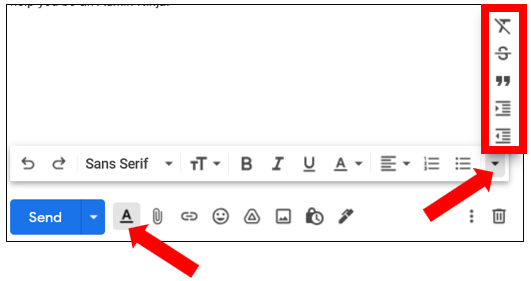
To hide the formatting options, just click on the underlined A button again.
Formatting text when replying to an email
It’s the same when you reply to an email – click on the formatting options (underlined A button) and it opens the same formatting options as the previous step.
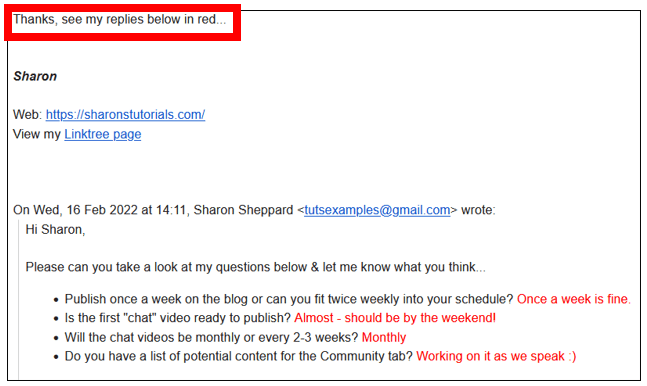
If you have an email where someone has asked you questions or has a list that you want to respond to, click on reply (or press keyboard shortcut r) and then click on the 3 dots at the bottom of the email which will show the email you’re replying to (the trimmed content) then you can type your answers next to the corresponding point or question…
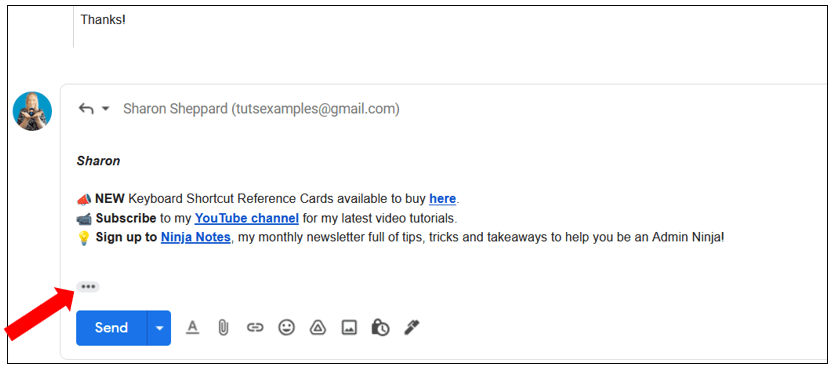
Highlight your text & choose a different font, or colour so it’s easy for the person you’re replying to to see your answers. Then add a note at the top of the email something along the lines of “see my replies below in red”…
Keyboard shortcuts
There are certain keyboard shortcuts that you can use to help save time when formatting an email, below is a list of them:
- Ctrl+Shift++ to make the text bigger
- Ctrl+Shift+- to make it smaller
Then you have the standard shortcuts for use in any text based apps or software:
- Ctrl+b = bold
- Ctrl+i = italics
- Ctrl+u = underline
Text alignment shortcuts are:
- Ctrl+Shift+l = left aligned
- Ctrl+shift+e = centre aligned
- Ctrl+shift+r = right aligned
To insert bullet points, use Ctrl+Shift+8 – make sure this is the 8 on your actual keyboard and not on the number pad
If you want a numerical list use Ctrl+Shift+7 (again the 7 on your keyboard, not the number pad)
And finally, to quickly remove formatting from selected or highlighted text, click Ctrl+\
If you want to know more keyboard shortcuts, I have created some reference cards to be downloaded and printed in a handy A5 size so you’ve always got them to hand – you can see them here in my online shop.