Grouping objects together in PowerPoint enables you to make a change to everything at the same time e.g. if you want to resize or move them as one, rather than faffing around doing each one individually! In this step-by-step tutorial I show you the basics of grouping, ungrouping and regrouping – I hope you find it useful. You can also find the video of the tutorial at the end of this post if you prefer to watch instead :)
Grouping objects together
First select the objects you want to group together – do this by holding down Ctrl when you click on each object. In the image below you’ll see I have 2 text boxes, an image and a shape selected…
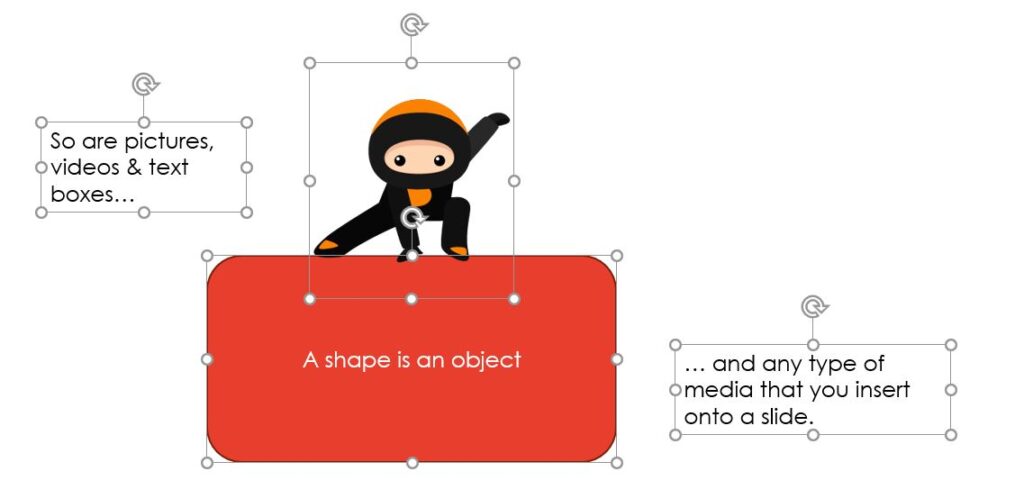
To group these objects together, you can either:
1. Place the cursor on one of the selected outlines and right click the mouse to open up a quick menu. Click on Group then Group…
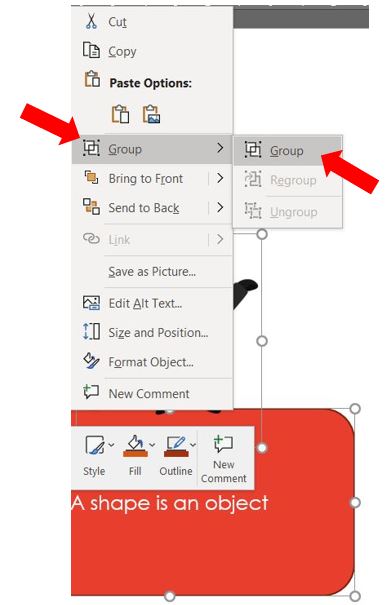
OR
2a. If shapes are selected, then click on Shape Format on the ribbon, go over to the Arrange section and click on Group, then Group…

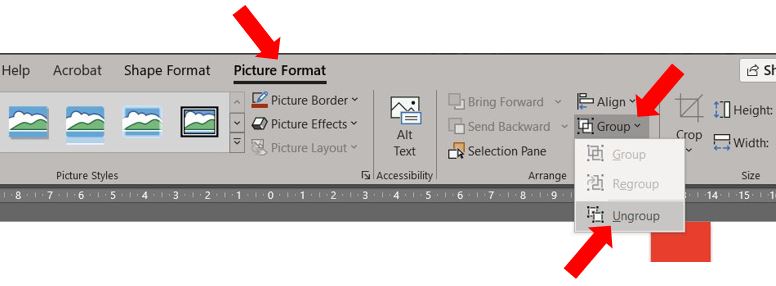
2b. If pictures are selected, then click on Picture Format on the ribbon, go over to the Arrange section and click on Group, then Group…

OR
3. Use the keyboard shortcut Ctrl+G to quickly group them together.
The objects will now be grouped together. If you want to make a change to a single object within the group, first select the group, then click on the item you want to change. You’ll see in the image below, I’ve selected the group, then clicked on the orange shape to make a change to it…
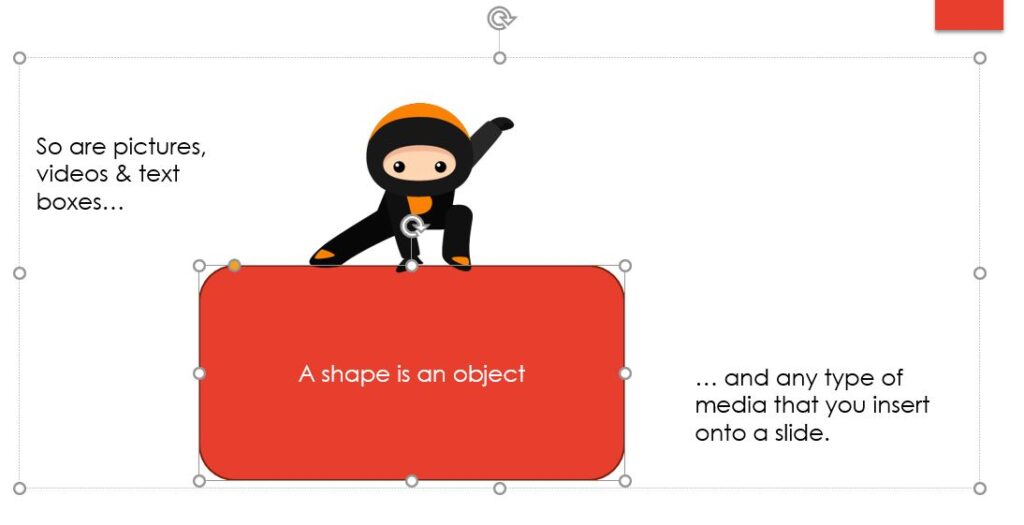
You may want to rename the groups, especially if you’re adding animations to the presentation – my earlier tutorial shows you how to rename the objects/groups, or you can watch my video here.
Ungrouping objects
To ungroup the objects, first select the group then, as above, you can either:
1. Place the cursor on the group outline and right click the mouse to open up a quick menu. Click on Group then Ungroup…
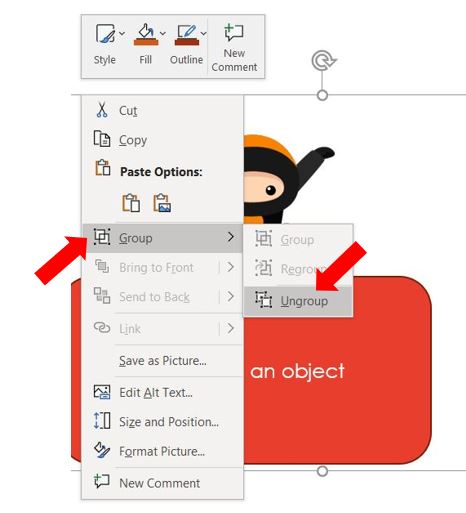
OR
2a. If shapes are selected, then click on Shape Format on the ribbon, go over to the Arrange section and click on Group, then Ungroup…

2b. If pictures are selected, then click on Picture Format on the ribbon, go over to the Arrange section and click on Group, then Ungroup…
OR
3. Use the keyboard shortcut Ctrl+Shift+G to quickly ungroup them.
Regrouping objects
Regrouping will group together all of the objects which were in the original group, without having to select all of the objects first. You only need to select one of the objects in the previous group then follow steps 1 or 2 above and select Regroup instead of Ungroup.
OR
3. Use the keyboard shortcut Ctrl+Shift+J to quickly regroup them.
Why won’t they group?
There may be times when go to the Group option and it’s greyed out so you can’t select it. Make sure you have more than 1 object selected – the group option needs at least 2 objects to be selected in order to function.
One final point to note is that the regroup function will only work during the active session. For example, if you ungroup a set of objects, close down the presentation then re-open it and try to regroup, it won’t work. You’ll have to select each object and group them from scratch.
So, there you have a basic guide to grouping of objects in PowerPoint – including really handy keyboard shortcuts :)
