There are 2 different ways of adding checkboxes into a Word document, depending on whether you want it to be completed on screen, or printed out and filled in with a pen. I show you both ways in this step-step tutorial :)
Checkboxes for printed documents
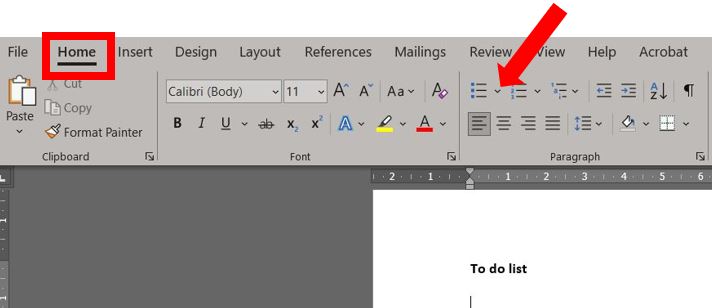
A quick way of adding checkboxes to a document that you know will be printed off is to add bullet points in the shape of boxes. To do this, position the cursor where you want the first bullet point to be, make sure you’re in the Home tab on the ribbon and click on the drop down arrow next to Bullets in the Paragraph section. Click on Define New Bullet…
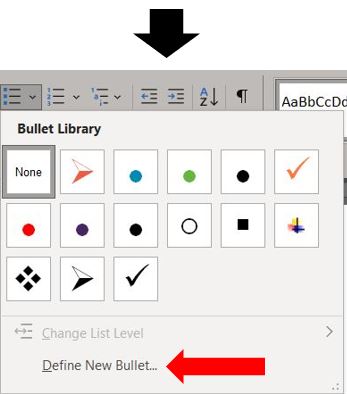
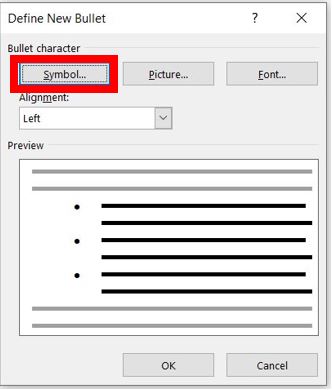
Click on Symbol…
Then choose a font that has a square box as one of its symbols – both Webdings and Wingdings are good fonts for this…
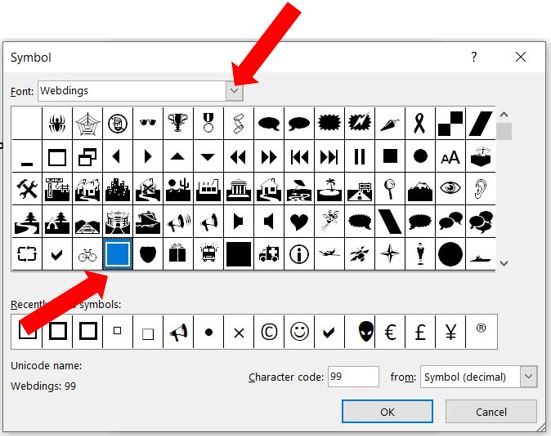
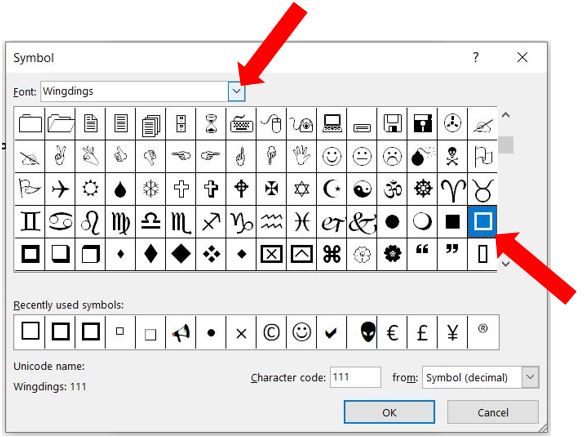
Choose which you prefer and click OK to get back to your document. This will now be ready for you to type out your list, press return at the end of each line to insert the next checkbox (bullet point) onto the next line…
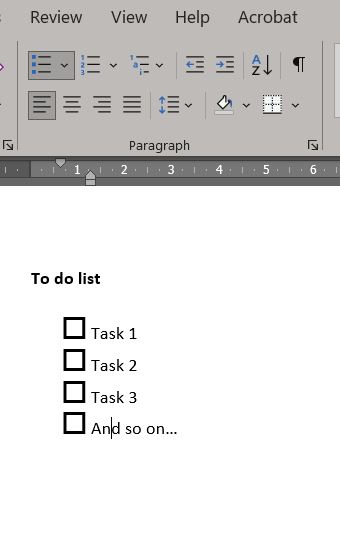
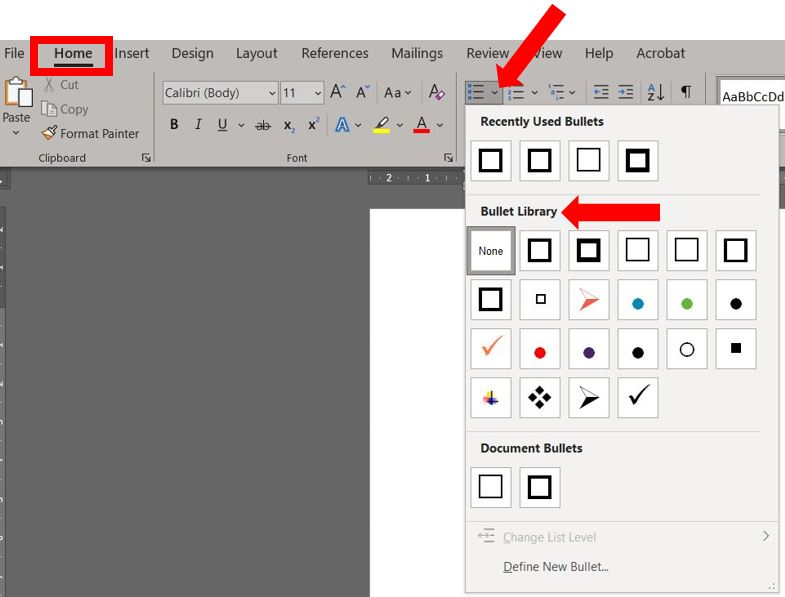
Continue formatting the document as you like before printing it out. Your new styled bullet point will be available to use in any new Word documents in the future without you having to define it as a new bullet point. To find it go to the Home tab on the ribbon, click on the drop down arrow next to the bullets and it will be included in your Bullet Library…
Checkboxes to be used on screen
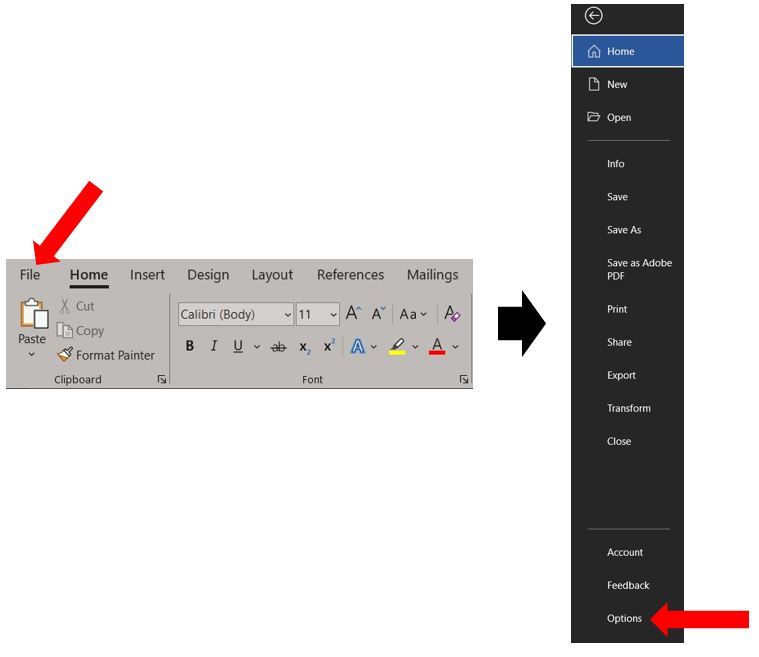
Checkboxes that are clickable on screen are inserted into your Word document via the Developer tab on the ribbon. If you can’t see the tab then you’ll need to enable it first. To do that, click on File in the top left corner and then click Options at the bottom of the list…
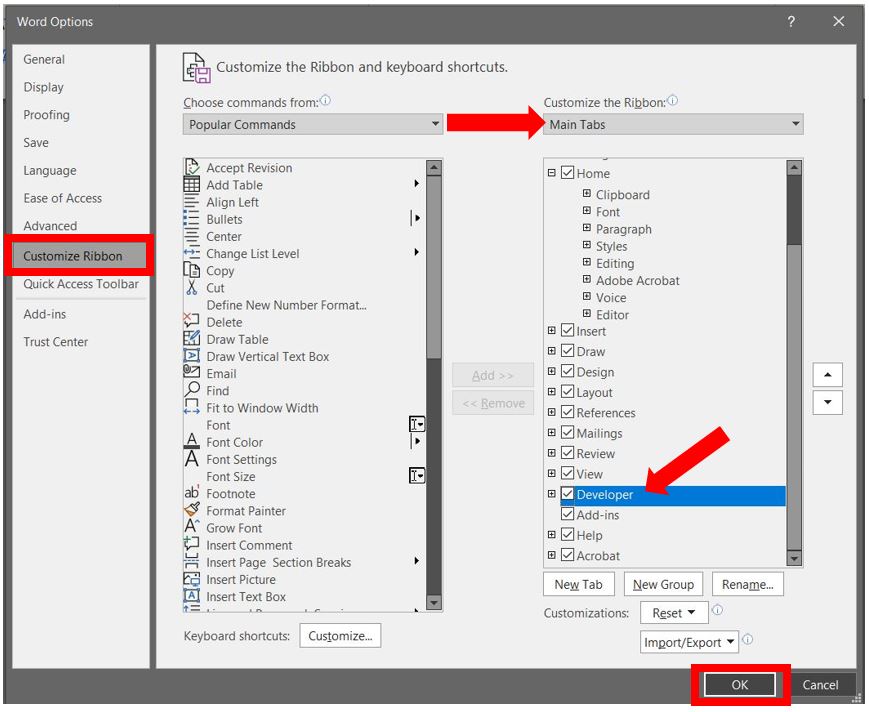
Click on Customize Ribbon on the left hand side, then select Main Tabs from the drop down menu over on the right. Scroll down the list until you get to Developer and tick the box next to it. Then click OK…
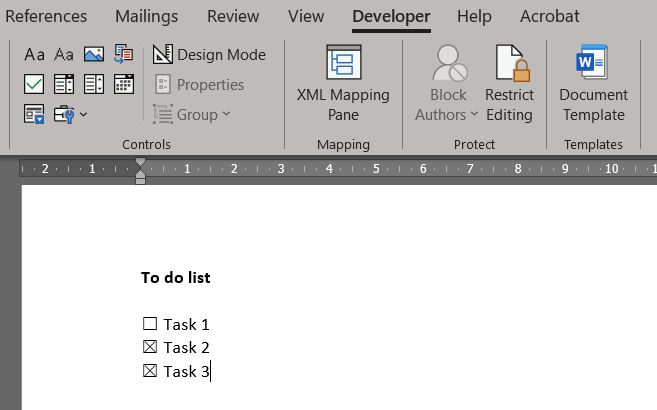
The Developer tab will now be visible on the ribbon. Click on it and in the Controls section, click on the checkbox icon. (Quick Tip: if you hover each icon the tooltip will tell you what they are for)

These checkboxes don’t work the same as bullet points so they won’t automatically appear on each line when you press return – you have to manually click on the icon wherever you want the checkbox to be placed. Click on the checkbox to alternate between it showing as ticked or not…
You can change the way the checkbox looks once it is ticked, to do this click on the checkbox and then click Properties in the Developer tab on the ribbon…

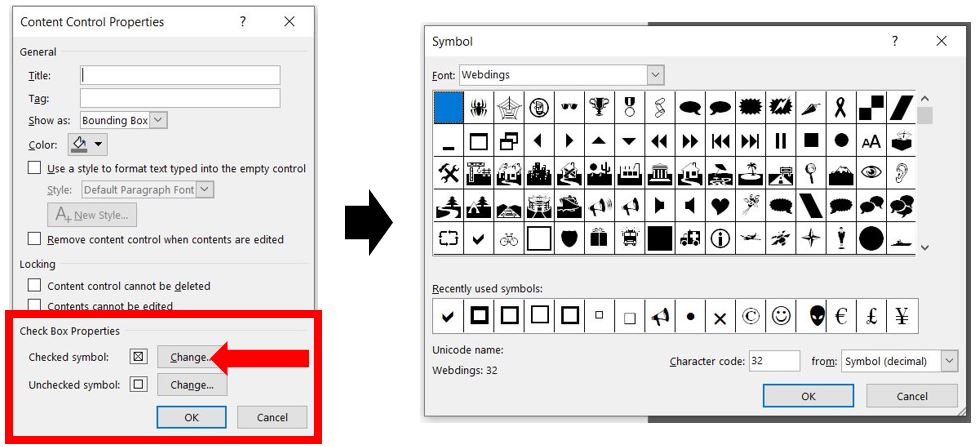
This opens up the Content Control Properties box – in the Check Box Properties section, click on Change if you want a different symbol to appear when someone ticks the box, then select a symbol you want to use…
Once you’re happy with it, click OK and that’s it :)
