There are a few different ways you can add your signature into a Word document. In this step-by-step tutorial I go through 4 of them which I hope you find useful – if you prefer to watch the video tutorial, go to the end of this post :)
1. Insert signature using an image
Sign your name on a blank white piece of paper and either take a photo or scan the signature using your phone. This will save the signature as an image. You can also crop the image on your phone if necessary – or you can do it through the Picture Format tools once it’s in the Word document.
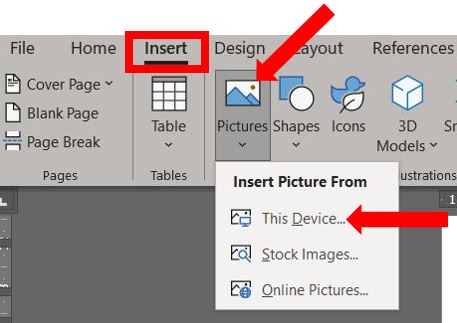
Click into the Word document where you want the signature to be placed, click on the Insert tab on the ribbon, go to Pictures, and select This Device, then navigate to where you saved your signature image…
You can use the drag handles around the image to resize the signature if you wish…
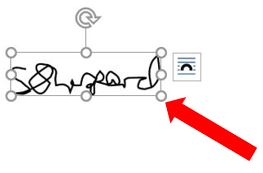
You can also use the Picture Format tools to recolour, crop, reposition the signature and more…

2. Insert signature using AutoText
If you want more than just your signature to be included i.e. your role, company name etc., first follow the steps above to insert your handwritten signature, then add the details below your signature that you want to be included. Click and drag your mouse over all of the signature content (text + image) to highlight it…

Click on the Insert tab on the ribbon, go over to the Text group on the right hand side, click on Quick Parts, then AutoText, and select Save Selection to AutoText Gallery…

This brings up the options for creating a new building block – give it a name and click OK…
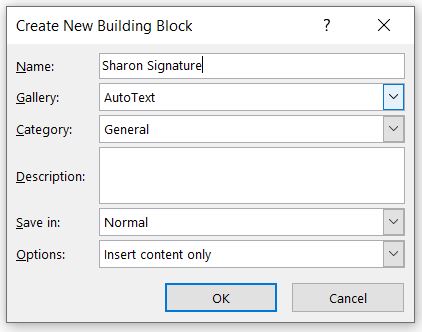
The next time you want to insert your signature, position the cursor where you want the signature to go, click on the Insert tab on the ribbon, click on Quick Parts, then AutoText, and select your signature preview…

Your signature block will now appear in the document.
3. Insert using Signature Line
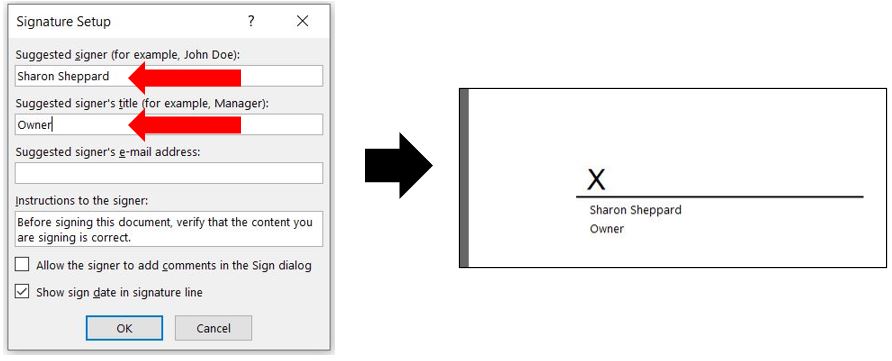
If you are printing a document out to be signed by someone else, it’s handy to use Microsofts Signature Line. Position the cursor where you want the signature line to appear, go to the Insert tab on the ribbon and click on Signature Line in the Text group over on the right hand side…

This opens the signature setup options where you can fill in the signers name and details if applicable…
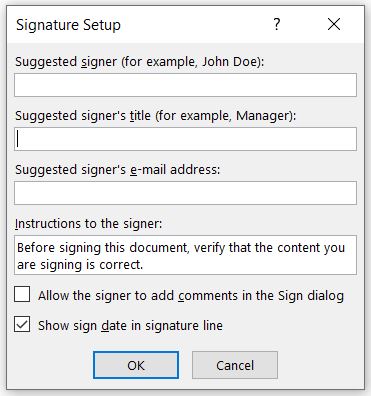
Once you’re happy with it, click OK and the signature line will appear, along with any details you have added…
4. Insert using Shapes
If you want to have a handwritten signature, another way of creating one is by using the freeform line tool inside Word itself. Go to the Insert tab on the ribbon, click on Shapes, then click on Freeform: Scribble in the Lines section (it’s the squiggly line on the far right)…
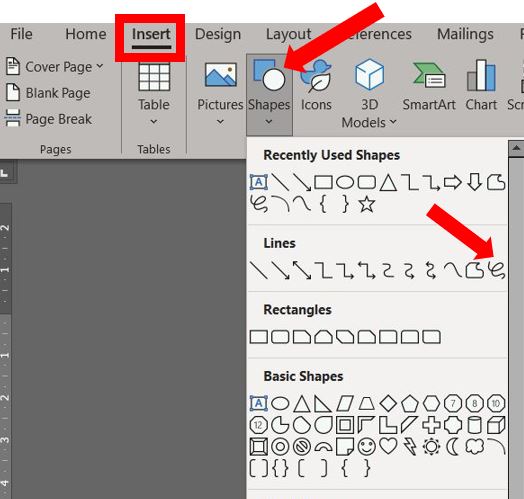
This will now change your cursor to a pen and just move your mouse to sign your name – as soon as you release the mouse, the signature will be inserted as a “shape”…

To resize the signature, just click on the drag handles and drag to increase or decrease it. To format the signature, click onto it and go to Shape Format on the ribbon – here you can change the colour, the alignment & positioning of the signature…

This method of signing can be difficult to do using the mouse, however if you are using a touchscreen or drawing tablet then it’s a lot easier to use your finger or stylus (pen).
So there you have 4 different ways of inserting your signature. Let me know in the comments which one is your favourite :)
