If you want to check that your camera, audio, speaker settings all work properly before jumping on to your next Zoom meeting with your boss or client, then Zoom’s test meeting feature is really handy!
Not only will you be able to go through everything technical, but also play around with the background filters, the chat and generally just familiarise yourself with what to expect in a standard Zoom meeting. The great thing about using this is that you can press all the buttons knowing that you won’t break anything or accidentally cut anyone off :)
The host of the meeting is Zoom and you will be the only participant. One thing to be aware of is that the meeting does have a cut off time so you will be notified at 3 minutes that the host is about to end the meeting. However, you can just click back on the link again and join another test meeting – you can do this as many times as you like. This step-by-step tutorial will show you what to expect when you join it. I’ve also included a video at the end showing you what to do :)
Where to find the test meeting
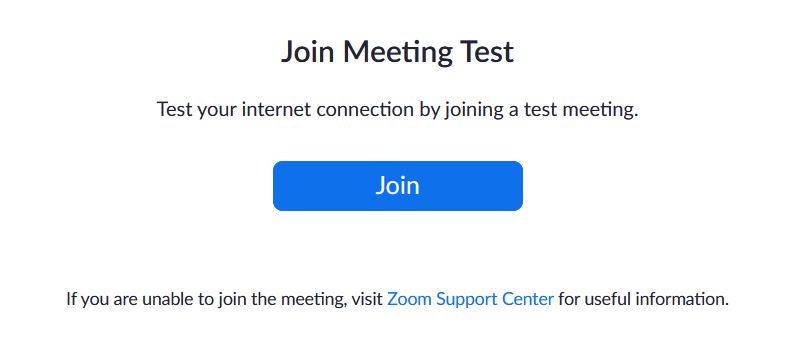
Firstly, you don’t need to be logged in even if you have a Zoom account – in fact you don’t need to have an account at all to join any Zoom meeting. Go to the following web address:
Click on Join…
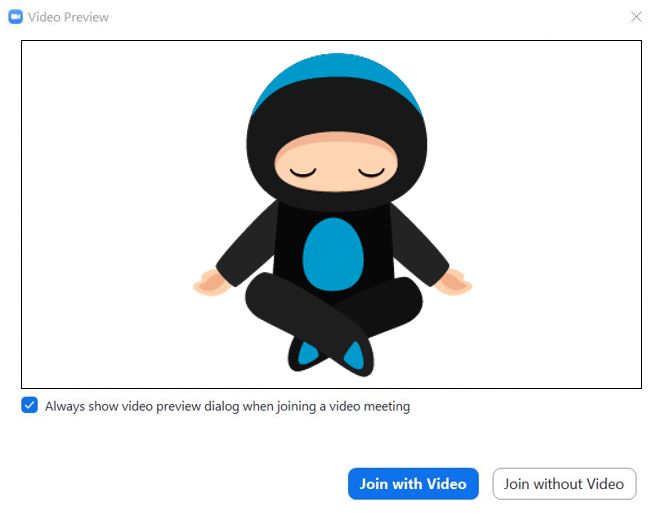
You will be asked if you want to join with or without video – it doesn’t really matter which one you choose as you can change it again once you’re in the meeting…
Move your mouse anywhere on the screen and the Meeting Controls toolbar appears at the bottom of the screen. This is where you can access the settings for your audio and video, as well as viewing the participants list (which is just you), and trying out the chat etc…

How to test your audio
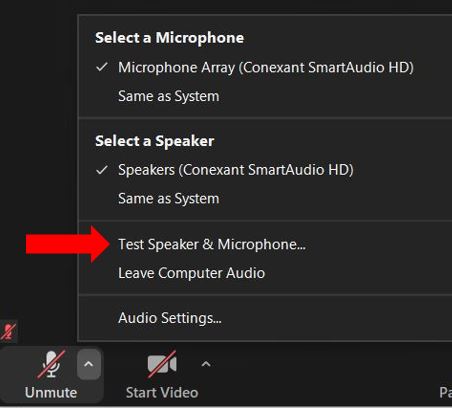
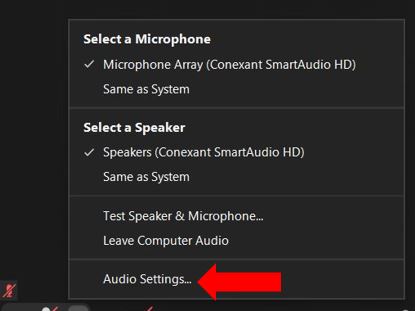
Click on the small upward arrow to the right of the microphone icon in the bottom left corner of the toolbar…

Choose which microphone and speaker you want to use, then click Test Speaker & Microphone…
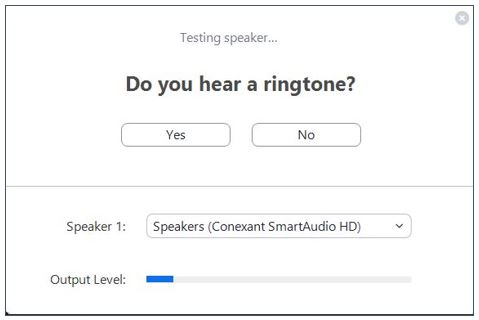
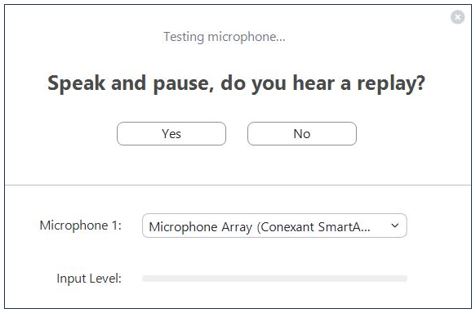
It will first test your speaker by playing a ringtone which you need to confirm whether or not you can hear it by clicking on Yes or No…
Next it will ask you to say something to test your microphone. When you stop speaking it will automatically playback and, again, you need to confirm that you can hear the recording by clicking on Yes or No…
You can also click into your Audio Settings…
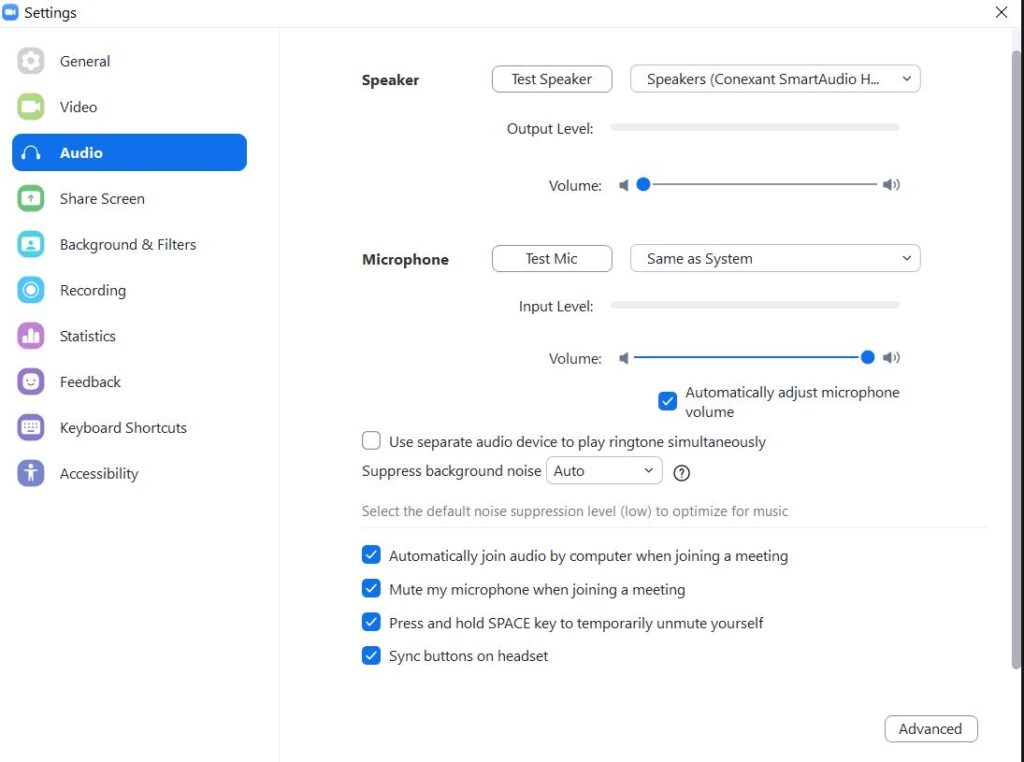
This opens up more details of your settings which you can go through and set up as needed…
Video Settings
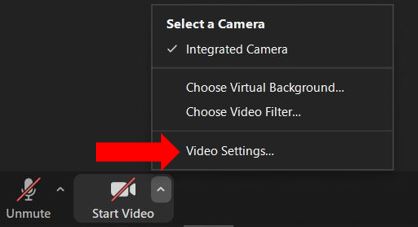
Once you’re happy with the audio side of things, you can then do the same with your camera settings. Click on the upward arrow to the right of Start/Stop Video to view the settings menu…
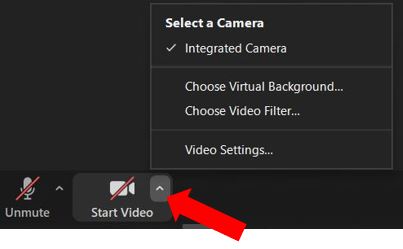
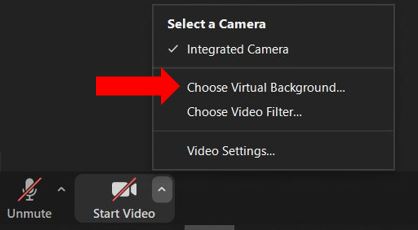
Click on Choose Virtual Background to open the selection of virtual backgrounds available to you…
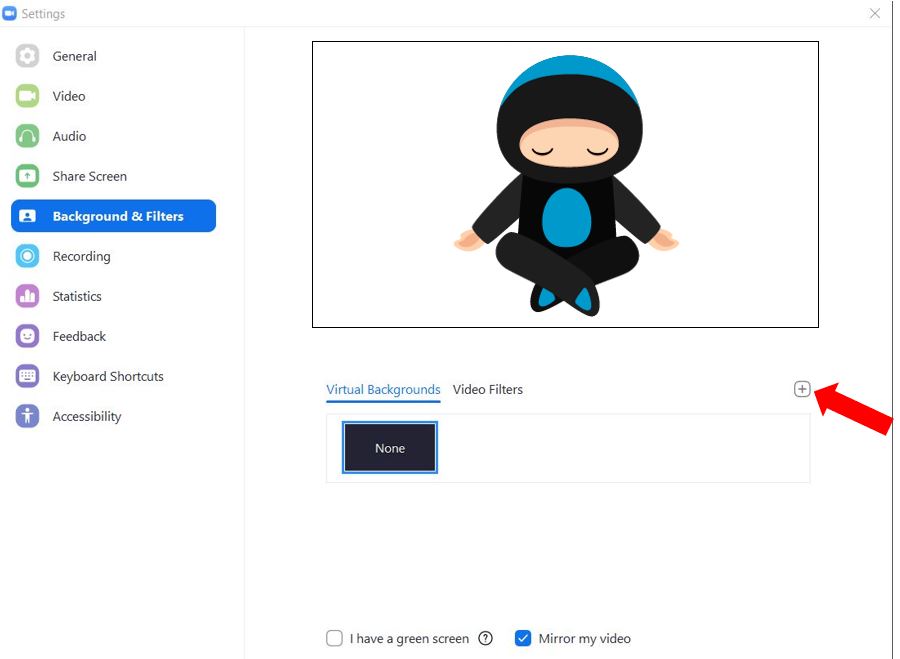
You can also upload your own video or image to use as a background by clicking the plus (+) symbol over on the right…
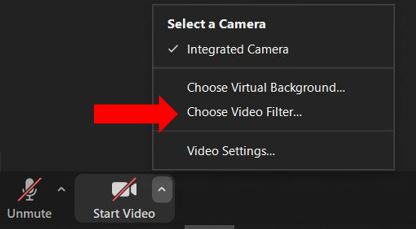
If you want to add filters to your video, click on Choose Video Filter…
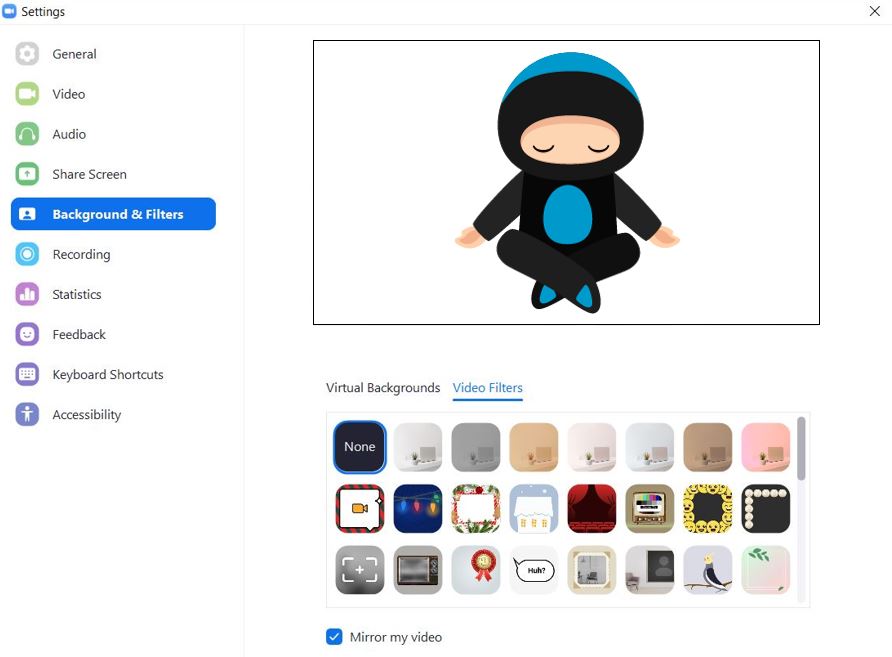
This opens a list of all the video filters you can use to bring a bit of variety to your video…
For more in-depth settings for your video, click on Video Settings…
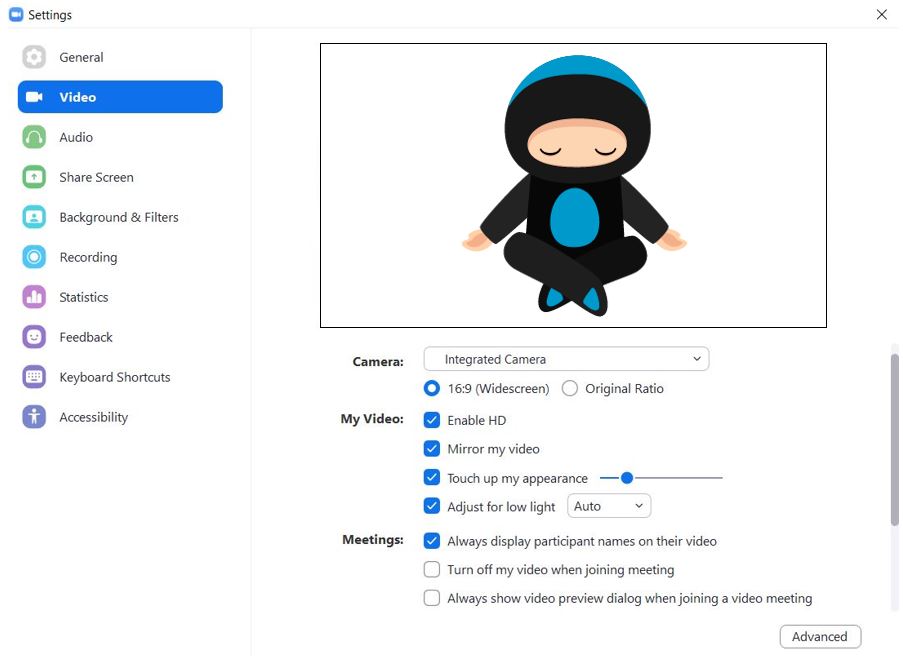
Here you can adjust the settings for low light, you can set your preferences for future meetings if you wish – there’s even an option to touch up your appearance to smoothe out any wrinkles you may have ;-)
Participants
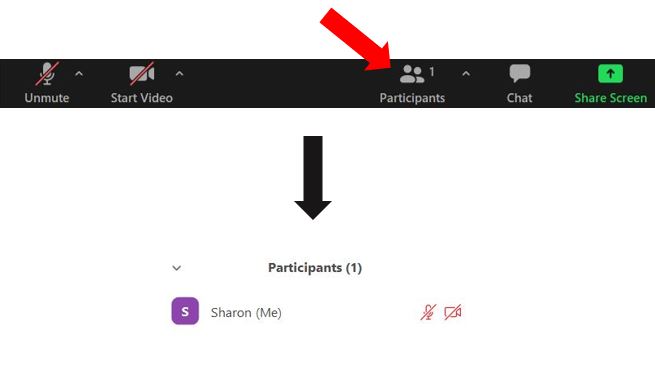
The next option on the Meetings Controls toolbar is Participants, click on this to view a list of participants on the right hand side (obviously it’s just you in the test meeting), hover over your name and you’ll see what other options are available to you, such as Rename. To close the list down, click back on Participants…
Chat
The next option is Chat, click on this and it will also open on the right hand side. If you don’t want it on the right, you can view it as a pop out window – to do this, click on the downward arrow to the left of Chat in the right hand pane, and choose Pop Out…
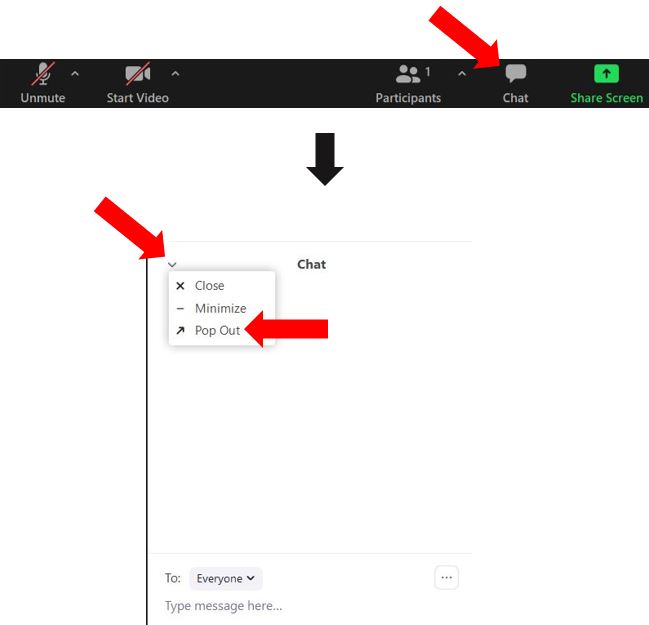
To disable the pop out view, click on the 3 dots at the bottom and choose Merge to Meeting Window, which will take it back to the pane on the right hand side…

The next 2 options on the Meetings Controls toolbar – Share Screen and Record – are not available in the test meeting.
Reactions
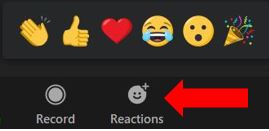
The final option is Reactions – click on this and 6 emojis appear for you to choose from, click on any of these and it will appear in the top left corner of your screen for 10 seconds – they are just another way of making the meeting interactive for everyone :)
If you want to leave the meeting earlier than the timed 3 minutes, you can click on Leave in the bottom right corner, at any time.
I really encourage you to use the test meeting, especially if you are new to using Zoom. I still use it before every meeting, just to check my lighting and background look okay and that there’s nothing inappropriate lying around! :)
