There may be times when you want to use a picture in your PowerPoint presentation and focus on the main subject of the image without the distracting background. There are 2 different ways of removing the background, depending on whether it is a solid block of one colour, or a menagerie of colours, patterns etc. I show you both ways in this step-by-step tutorial :)
In your presentation, you’ll first need to insert the image you want to use. There are actually 3 different ways of doing this:
- Drag and Drop the image straight into the slide.
- Copy and Paste the image into the slide (using Ctrl+C to copy and Ctrl+V to paste).
- Going to the Insert tab on the ribbon, clicking Pictures, and selecting where the image is located.
Once the image is inserted, you can then move on to removing the background.
How to remove a solid coloured background
You can see in the image below that it has just one solid background colour…

First click anywhere on the image and you’ll see there is now a new tab on the ribbon called Picture Format…

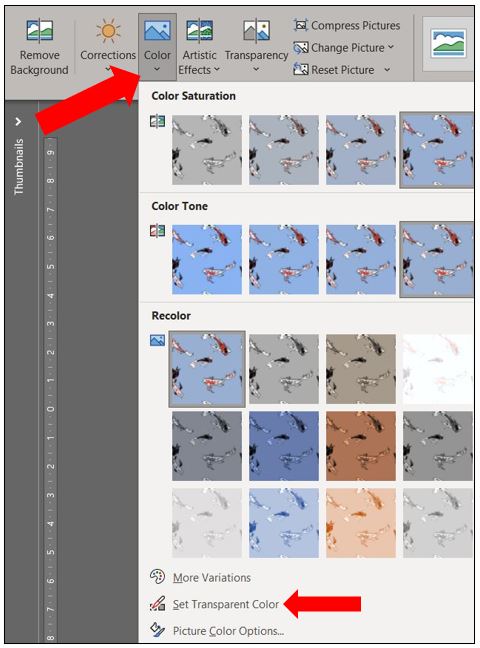
Click on Picture Format and you’ll see a range of options now available to you for formatting your picture. Click on Color and then click on Set Transparent Color…

You’ll notice the cursor has now changed to a little pencil, you can now choose the colour which you want to be transparent e.g. the solid background colour. In this example it’s the blue background. After I click on the blue background, it’s removed and is now the same colour as the actual slide (in this example white)…

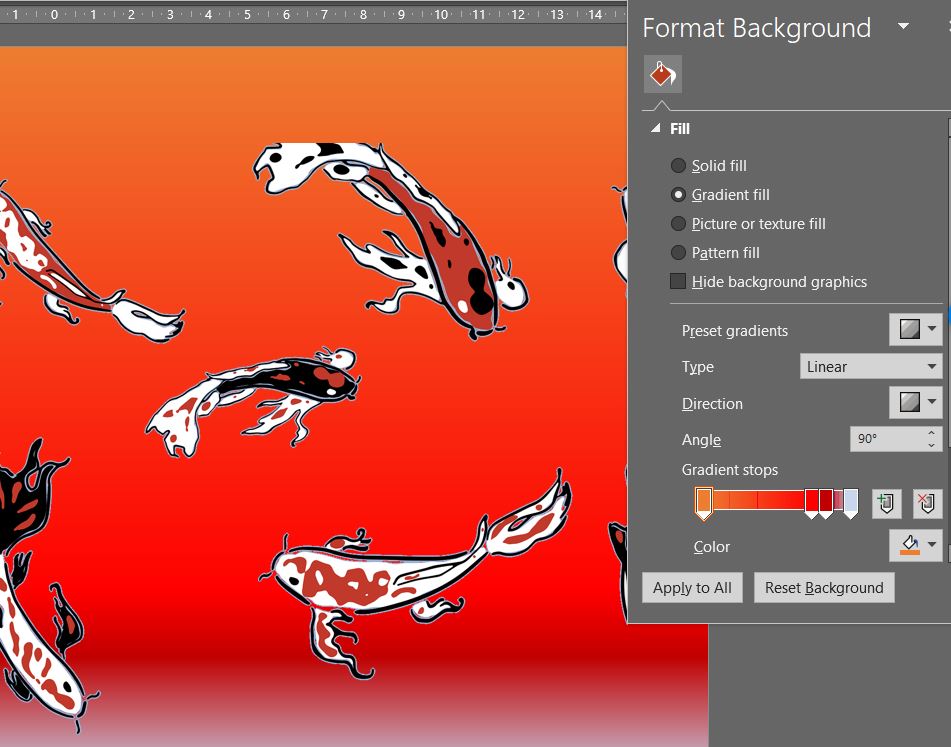
If you now right click anywhere on the slide, and go to Format Background, you can choose a different colour, pattern, gradient for your slide and the picture will incorporate that…

How to remove a complex background
The image below has a lot of different colours, textures etc in the background so setting a transparent colour won’t work…

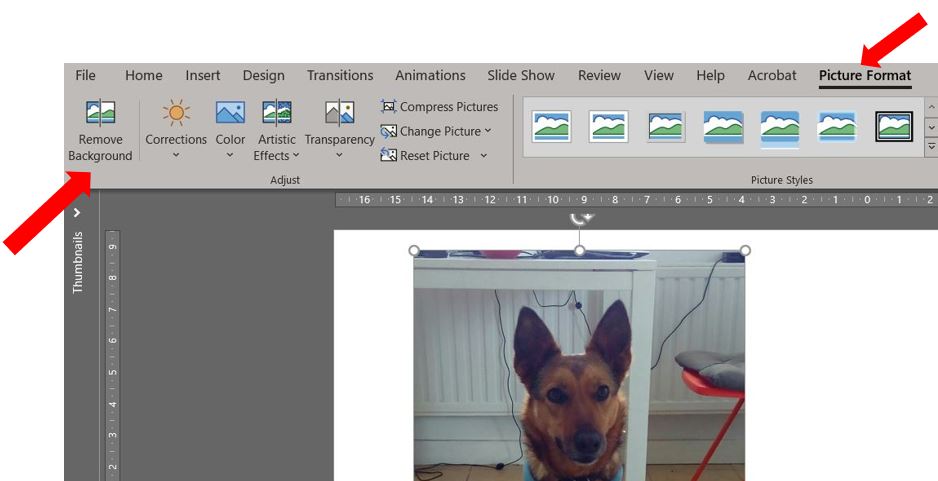
Click on the image after you’ve inserted it into your slide, go to Picture Format on the ribbon and click on Remove Background way over on the far left side…

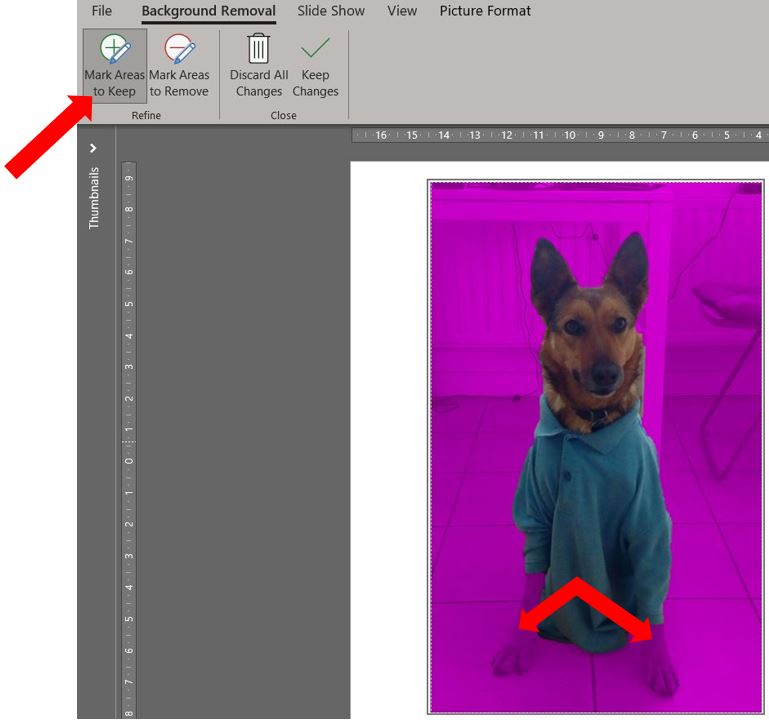
PowerPoint will try to remove as much of the background as it can. Everything in the magenta colour will be removed, so you will probably need to do a bit of tweaking to it…

You’ll also notice on the ribbon, you now have a different set of options. So you’ve got Mark Areas to Keep, Mark Areas to Remove, Discard All Changes, and Keep Changes…

You can see in my example, that Xena’s paws are also coloured in magenta which means they’re going to be removed and I don’t really want that. So I need to click on Mark Areas to Keep, then click her paws to let PowerPoint know that I want to keep them…

Just click and mark all areas you want to keep. It can be a little bit fiddly, and you might see different things appear and disappear in the background as you click, so it’s just a matter of alternating between marking areas you want to keep and marking the areas you want to remove.
Once you’re happy with it, click on Keep Changes which will close the Background Removal tab. If you want to start again then click on Discard Changes…

In my example you can now see Xena has no background, and I can format the slide if I wish to a different colour as below :)

If at any time you want to go back into the image and make any changes to it, just select the image, go back to Picture Format and click on Remove Background again. The background will reappear as magenta and you can go through the process of marking any areas you want to keep/remove, and then just keep or discard all changes.
If you want to watch me go through the above steps, click on the video below :)
