Autoresponders are great! Not only for when you are on holiday, or away from your desk, but also just to let people know that you only check emails at a certain time during the day, or to expect a reply within 48 hours.
Here are 2 different ways of setting up your out of office reply in Gmail – I hope you find it helpful! The video is at the end of this post if you prefer to watch the tutorial instead :)
1. Using Settings
This is the quickest and easiest way of setting it up, especially if you want the same message to go to everyone who emails you.
First, click on the cog wheel in the top right corner and click See all settings…

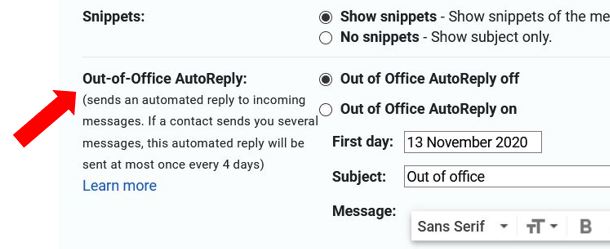
Make sure you’re in the General tab and scroll down to the bottom of the page to the section named Out-of-Office AutoReply…

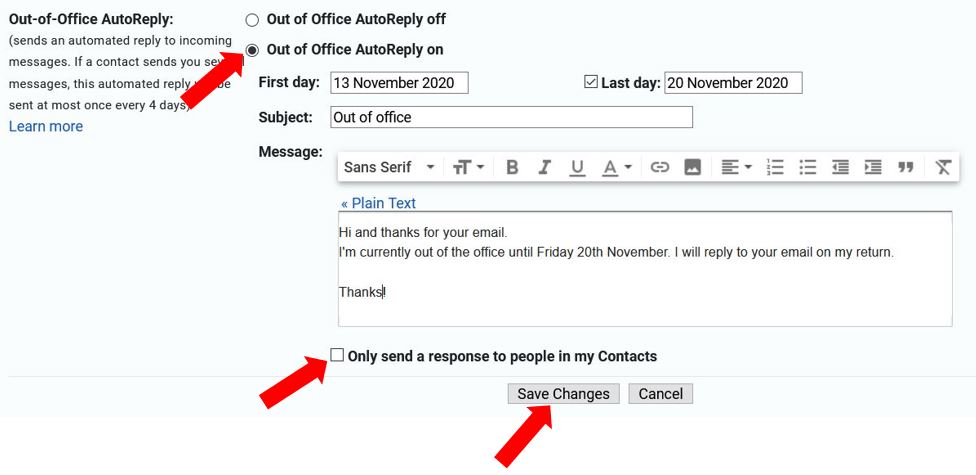
Click the circle next to Out of Office AutoReply on to switch it on, then set the dates you want it to run from and to. Type in your subject line and message letting people know when you’re next available / back in the office, and an alternative contact (if applicable). If you only want the autoreply to go to people already saved in your Contacts then make sure to tick the box Only send a response to people in my Contacts. If you want the reply to go to everyone, then leave the box unticked and just click Save Changes…
You will now see a yellow bar across the top of the screen letting you know that your out of office is on. If you want to edit it, click on Out of Office Settings. If you want to switch it off, click on End now…

Alternatively you can go back into the main settings by clicking on the cog wheel in the top right corner, and clicking See all settings as before.
2. Using templates
Another way of setting up the out of office is to use a template that you have created. This is ideal for if you only want the autoreply to go to certain people. To set up a template, first you have to make sure templates are enabled in your settings. Click on the cog wheel in the top right corner, and click See all settings…

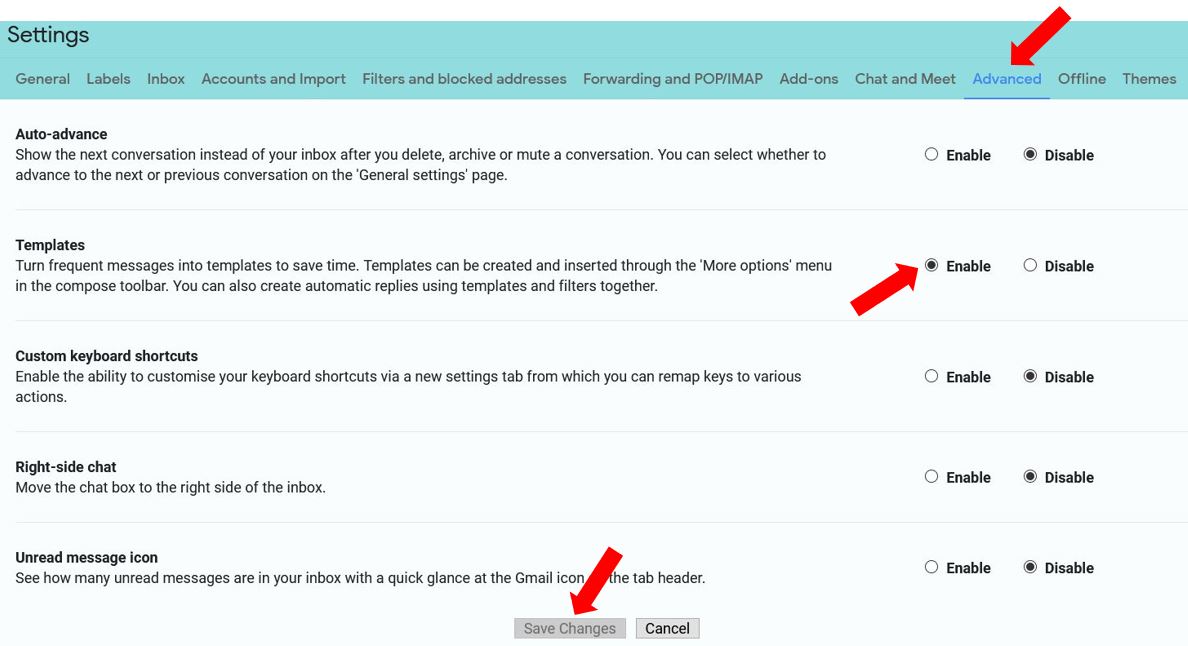
Click on the Advanced tab and tick Enable next to the Templates section, then click Save Changes…
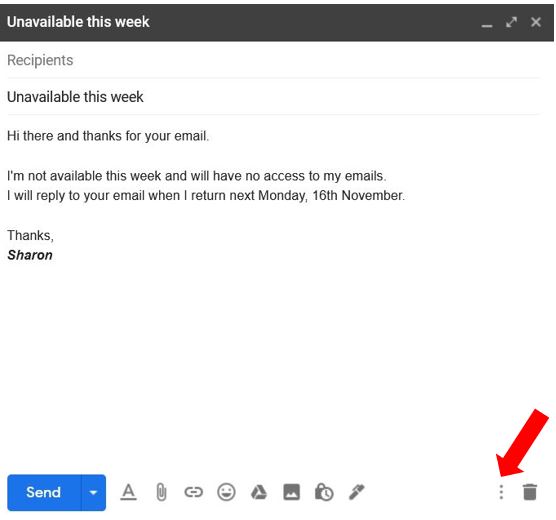
Go to Compose and type out your autoreply, then click on the 3 dots (more options) in the bottom right corner of the email…
Click Templates, then Save draft as template, then Save as new template…
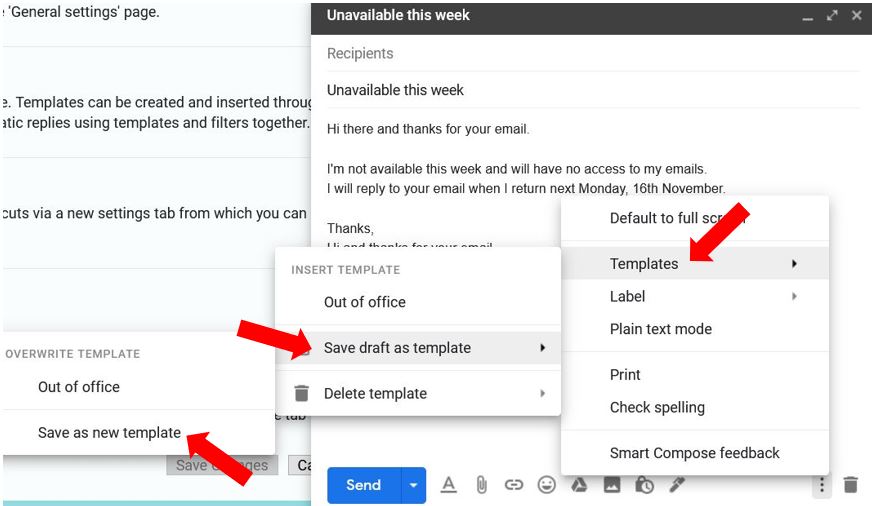
Give it a name and click Save…

You can then discard the email. The next thing is to set up a filter so you can set who you want the autoreply to go to. To do this, click on the drop down arrow to the right of the search bar…

Then set up the filter. If you want to send the autoreply to specific people only, you can enter their email addresses in the From section… or if you know their email addresses contain a certain word e.g. the company name, then add that word into the Includes the words section. Then click Create filter…

You then need to tell it what you want it to do once you get an email containing the word you set up in the previous step. In this case you want it to send the template, so click Send template, then choose which template you want it to send. In this example it’s the one called Unavailable this week, then click Create filter…
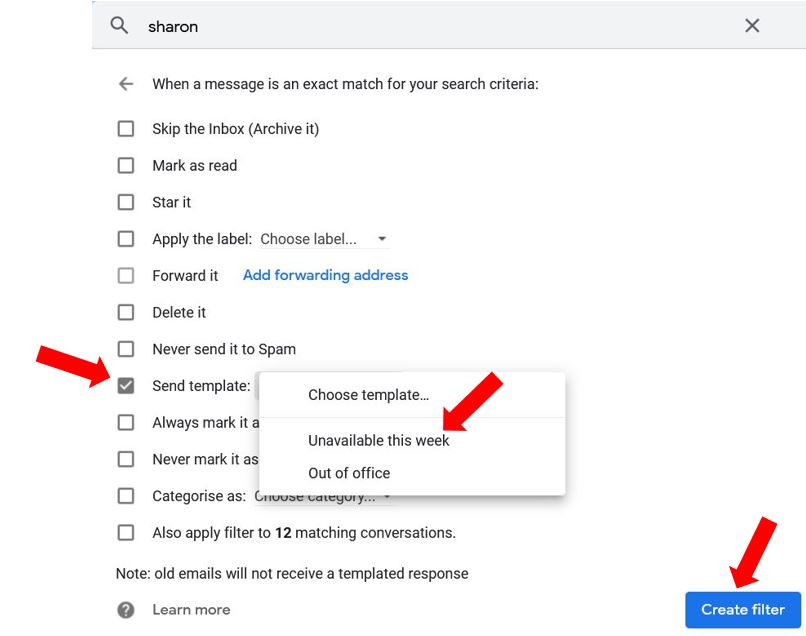
This is now set up that when you receive an email matching the criteria you’ve set up, they will receive the autoreply you created as a template.
To make changes to the filter, or to disable it, click on the cog wheel in the top right corner of the screen, and click on See all settings…

Go into the Filters and blocked addresses tab, then click either Edit or Delete next to the filter you want change…

And that’s it – 2 quick ways of adding an autoreply depending on who you want it to go to :)
