Our increased use of social media and messaging apps means it probably comes as second nature to add an emoji at the end of what we’re typing. Whilst this is easy enough to do on our mobiles, you may be wondering how to do it when you’re on your computer… this quick tutorial shows you how. My video at the end of this post shows the steps needed on a PC :)
On a PC
There are a couple of ways to bring up the emoji keyboard on your PC.
Method 1:
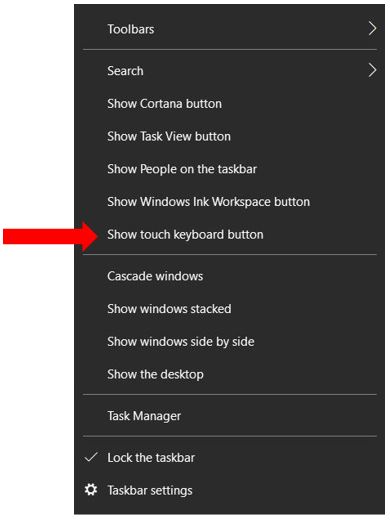
The first way is to right click your mouse anywhere on the Windows taskbar and tick Show touch keyboard button…
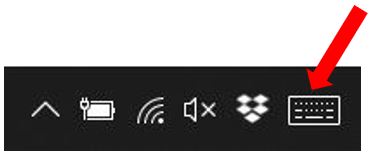
This will add the touch keyboard button to the bottom right of the taskbar. Anytime you want to insert an emoji, click on this keyboard button…
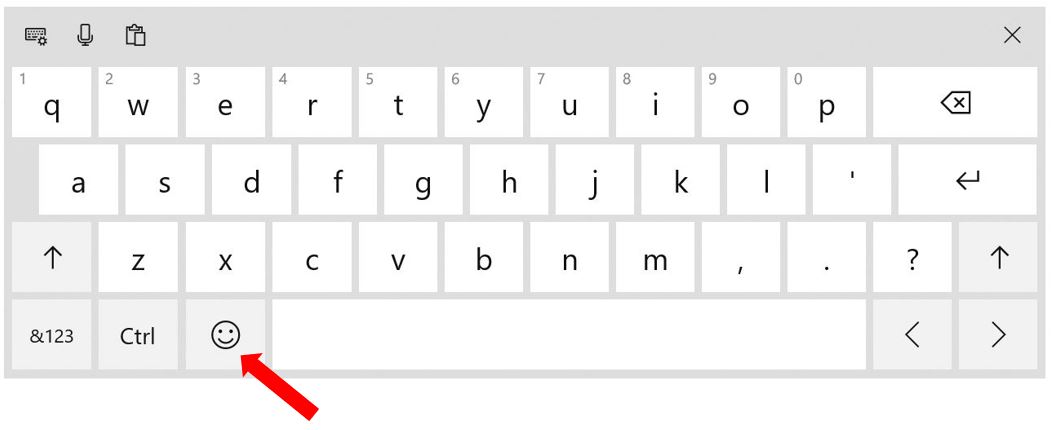
And it will bring up the keyboard. To view the emojis, just click on the smiley face to the left of the spacebar…
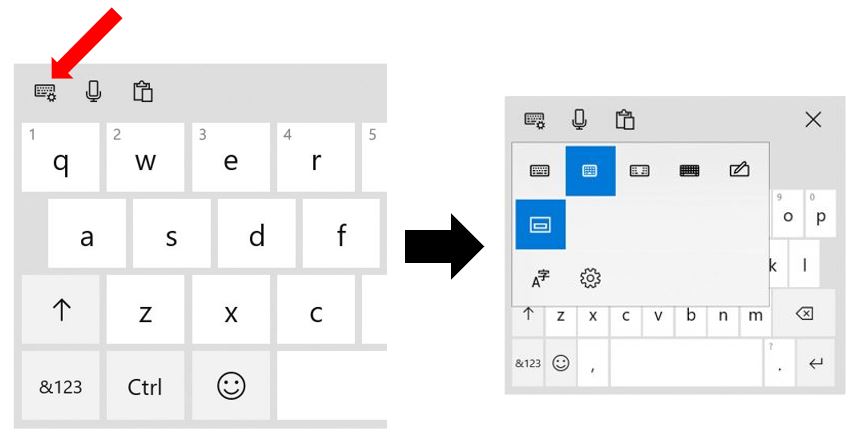
Click on the keyboard icon in the top left of the keyboard and it opens a few different viewing options for you to choose from…
Method 2:
The quickest way to bring up the emoji keyboard is to use a keyboard shortcut! Press either of the following:
Windows key + ; (semi-colon)
OR
Windows key +. (full stop)
On a Chromebook
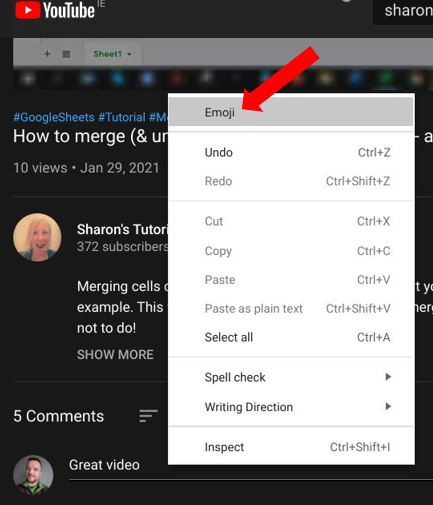
Place the cursor in the text box where you want to insert the emoji & right click the mouse. Click on Emoji…
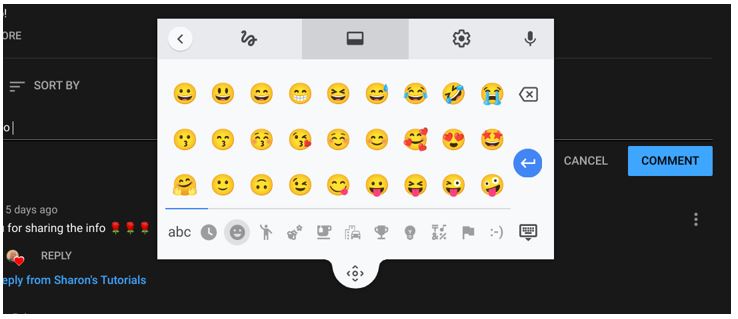
The keyboard will either appear across the bottom of the screen…

… or as a floating keyboard…
On a Mac
To view the emoji keyboard on a Mac, place the cursor in the text box where you want to the emoji to appear and use the following keyboard shortcut:
CTRL + CMD + Space
So the next time you’re typing on your computer and you want to add an emoji without using the usual :-), then follow one of the methods above and you’ll be sorted! I hope you’ve found this helpful, let me know in the comments, thanks!
